Step-by-step guide to assign license to a user in Office 365
Managing user accounts in Office 365 is an essential task for administrators. Whether you're setting up new employees or managing user roles, this guide will walk you through the process of adding a user license with ease.
Step 1: Log in to Office 365 with Admin privileges
To start, ensure you are logged into Office.com using an account with admin privileges. Without these rights, you won’t be able to create or manage users.

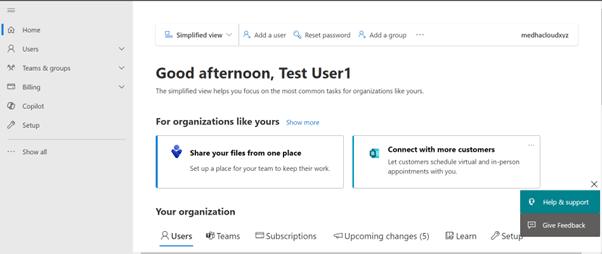
Step 2: Open the Admin panel
Once logged in, locate the Admin app from the available Office 365 applications or by selecting it from the app launcher (the grid icon in the upper left corner). This will take you to the Office 365 Admin Center.
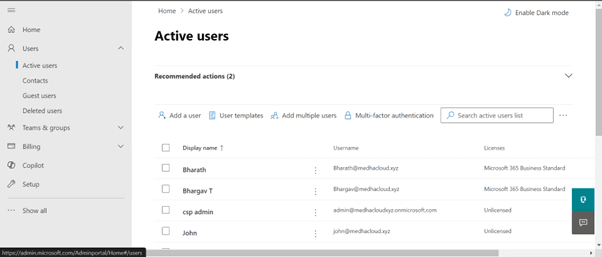
Step 3: Navigate to users > Active users
In the left-hand navigation panel, go to Users and select Active Users. This will display a list of all active users within your Office 365 organization.
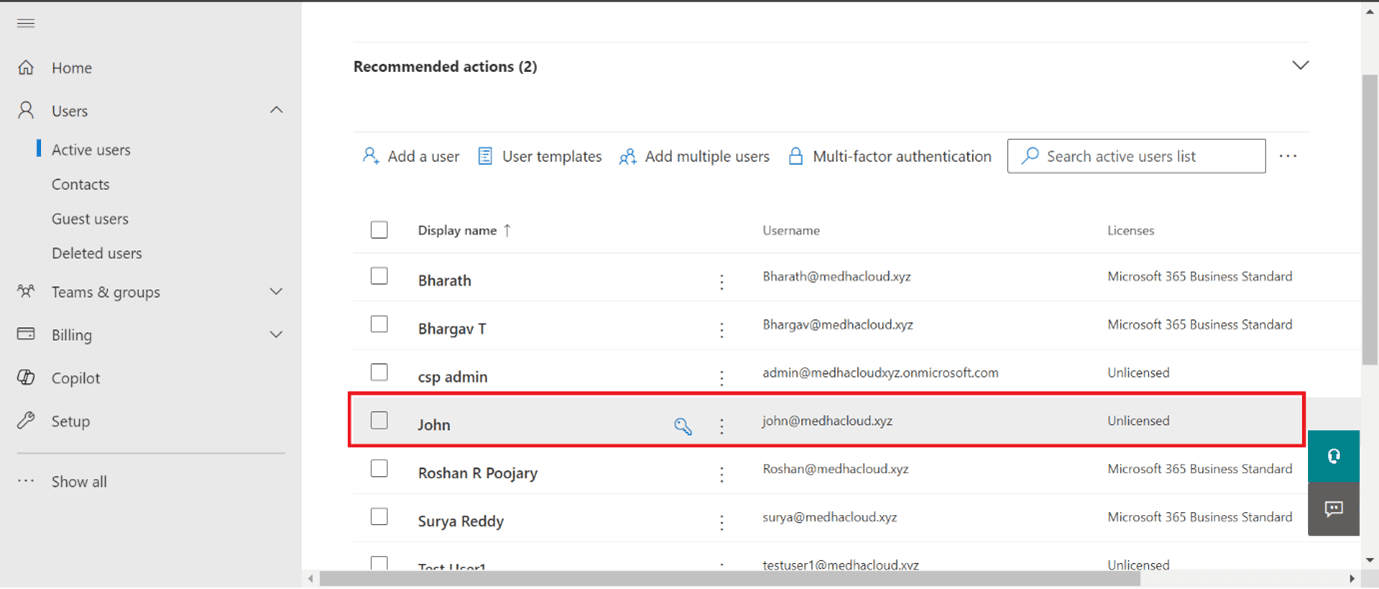
Step 4: Select the user to assign a license
From the list of active users, click on the name of the user you want to assign a license to. This will open the user's account details.
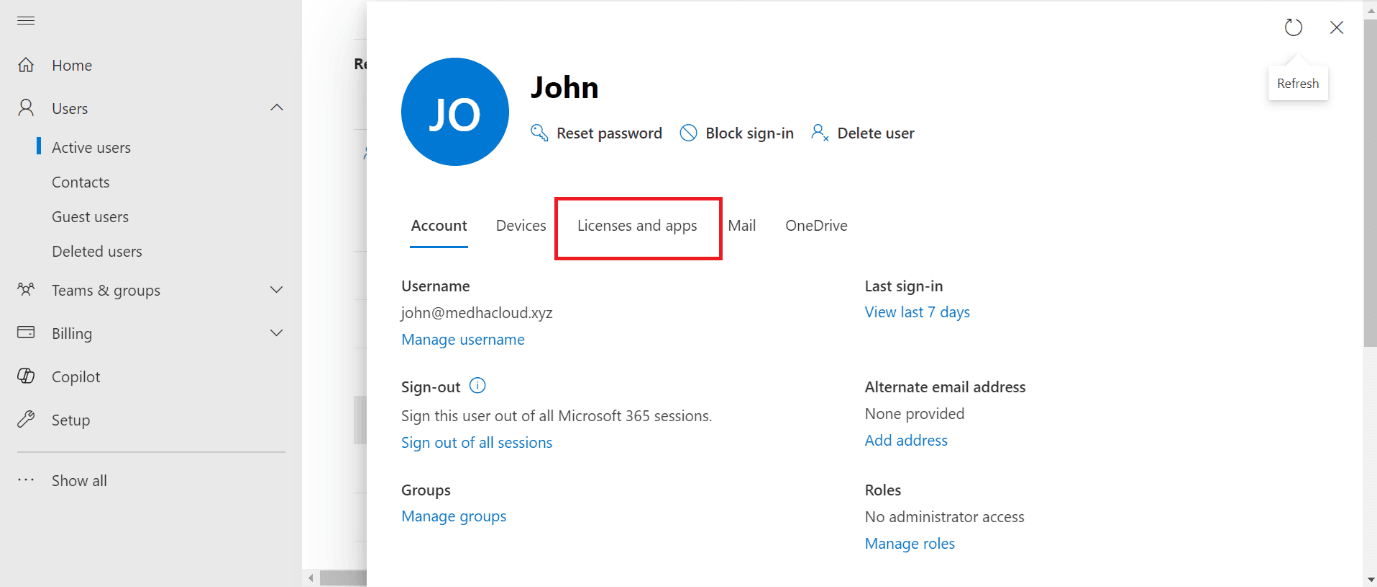
Step 5: Go to the licenses and apps section
Once you're in the user’s account details, scroll down or navigate to the Licenses and Apps section. Here, you’ll see a list of available licenses that can be assigned to the user.
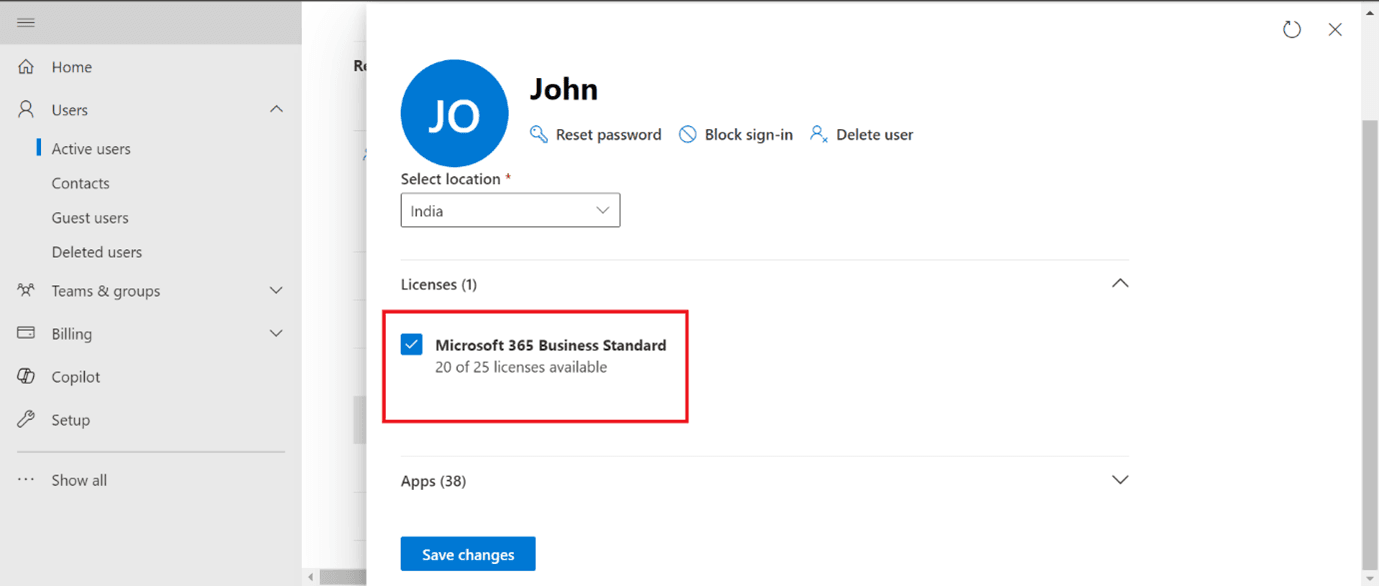
Step 6: Choose the license to assign
Select the appropriate license based on the user’s requirements. Office 365 offers various plans such as Business Basic, Business Standard, and Enterprise plans, each providing different levels of access to Microsoft services like Teams, OneDrive, and Outlook.
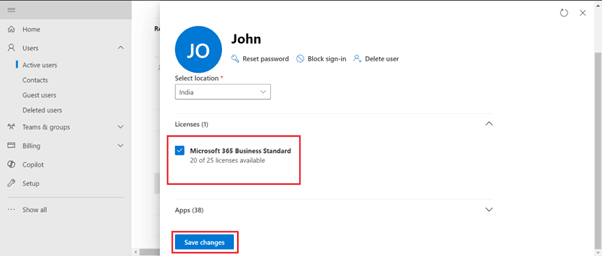
Step 7: Save and apply the changes
After selecting the appropriate license, scroll down and click Save. This will apply the license to the user’s account, and they will now have access to the services covered under that license.
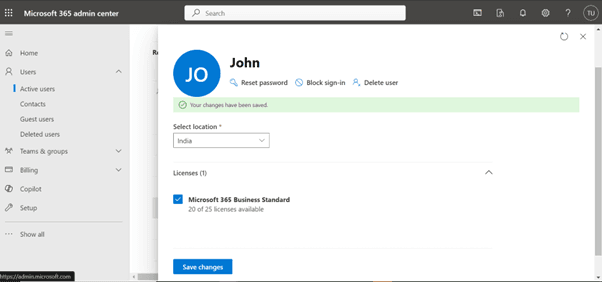
Step 8: Verify license assignment (optional)
To verify that the license was assigned successfully, go back to the Active Users section and click on the user’s name again. You should see the assigned license listed under their account.
That’s it! You’ve successfully assigned a license to a user in Office 365, allowing them access to the apps and services they need to work efficiently.
For more help with Office 365 user management or to explore more Office 365 solutions, contact Medha Cloud today. Our team is here to assist with all your Office 365 needs!
The most popular Microsoft 365 plan for small and medium businesses — get desktop apps, email, and collaboration tools.
Compare Business Standard FeaturesTopics
Bharath Kumar
Senior Microsoft 365 Consultant • 8+ years
Bharath is a Senior Microsoft 365 Consultant specializing in enterprise productivity solutions and white-label IT services. He has successfully deployed Microsoft 365 for over 200 organizations and helps MSPs build scalable white-label partnerships.
More in Microsoft 365
View all
Microsoft Copilot Free — What You Get, Limits & Every Way to Use It (2026)
7 min read

What Is Microsoft Copilot? Free vs Pro vs Microsoft 365 Copilot Explained (2026)
9 min read

Microsoft Word Online Free — How to Use Real Word Without Paying (2026)
6 min read

PowerPoint Download — Free Web Version, Mobile & Desktop (2026)
6 min read

Word Download — Free Web Word, Mobile Apps & Desktop Install (2026)
6 min read

Outlook Download — New Outlook, Classic, Mac, Mobile & Free Web (2026)
7 min read