A step-by-step guide to creating guest users in Office 365
Guest users in Office 365 are a convenient way to collaborate with external partners, clients, or contractors. By inviting guest users, you can give them limited access to your organization’s resources, such as documents or shared projects, without granting full access to your internal network. This guide will walk you through the process of creating guest users in Office 365.
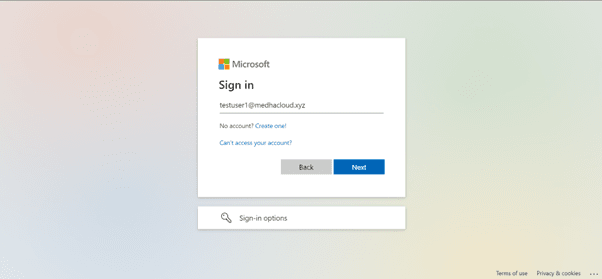
Step 1: Log in to Office 365 with Admin privileges
To start, log in to Office 365 using an admin account. Only users with administrative privileges can invite and manage guest users.
Step 2: Open the Admin panel
Once logged in, access the Admin app from the Office 365 app launcher (the grid icon in the upper left corner). This will take you to the Admin Center, where you can manage users and their access.
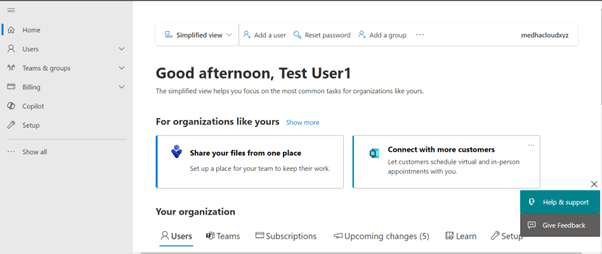
Step 3: Navigate to users > Guest users
In the Admin Center, click on Users from the left-hand navigation pane and then select Guest Users. This section displays a list of guest users that have already been added to your organization or allows you to invite new ones.

Step 4: Click "Invite a guest"
To invite a new guest user, click on the Invite a guest button. This will open a form where you can enter the guest’s information.
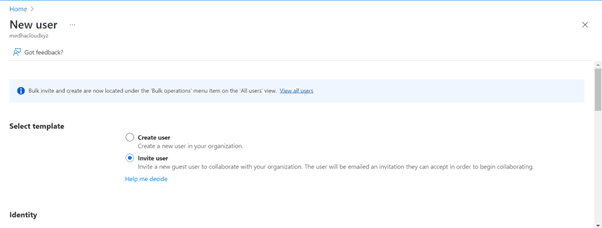
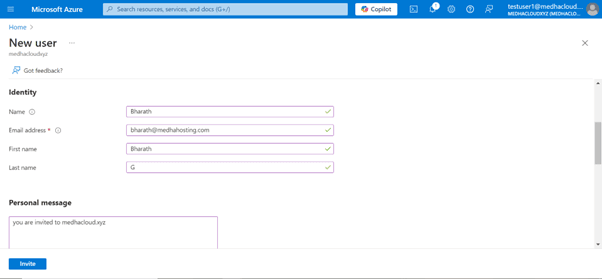
Step 5: Enter guest user details
Fill out the guest user’s details, including their full name and email address. Ensure that the email address you provide is correct, as this is where the invitation will be sent.
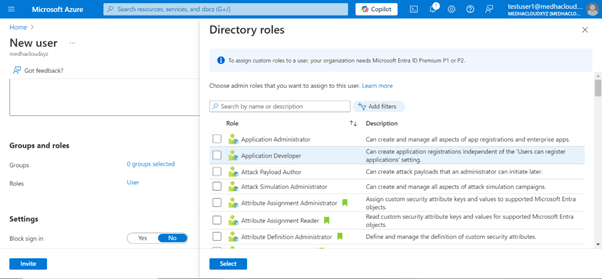
Step 6: Assign access to resources
You can choose which resources the guest user will have access to, such as specific SharePoint sites, Teams channels, or documents. Select the appropriate access level for the guest based on your collaboration needs.
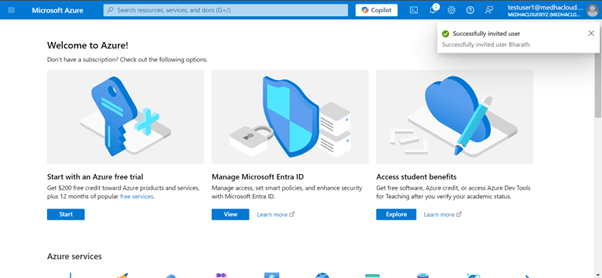
Step 7: Send the invitation
After filling in the necessary details and assigning access, click Send invitation. The guest user will receive an email invitation to join your organization’s Office 365 environment. They’ll need to accept the invitation and authenticate their identity.
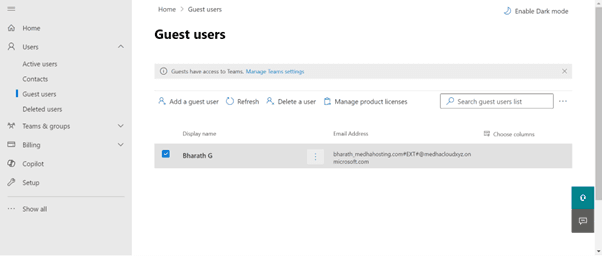
Step 8: Monitor guest user status
You can monitor the status of the guest invitation in the Guest users section. Once the guest accepts the invitation, their status will update to active, and they will have access to the assigned resources.

Step 9: Manage guest user access (optional)
At any time, you can modify the guest user’s access or remove them from your organization. This can be done by selecting the guest from the Guest users list and adjusting their permissions.
By following these steps, you can easily create guest users in Office 365 and manage their access to your organization’s resources, enhancing collaboration while maintaining security.
For more help with managing guest users or other Office 365 features, contact Medha Cloud today. We’re here to assist with all your Office 365 collaboration needs.
Compare Microsoft 365 plans and find the right license for your organization.
Microsoft 365 Licensing OptionsTopics
Bharath Kumar
Senior Microsoft 365 Consultant • 8+ years
Bharath is a Senior Microsoft 365 Consultant specializing in enterprise productivity solutions and white-label IT services. He has successfully deployed Microsoft 365 for over 200 organizations and helps MSPs build scalable white-label partnerships.
More in Microsoft 365
View all
Microsoft 365 Migration Checklist — 27 Steps Before, During & After (2026)
11 min read

How Much Does Exchange to Microsoft 365 Migration Cost? (2026 Guide)
9 min read
Microsoft 365 Statistics 2026: Market Share, Adoption & Pricing Data
14 min read
Microsoft 365 Cost Optimization: How to Cut Your Licensing Spend by 30% Without Losing Features
22 min read

Microsoft 365 Security Checklist: 100 Settings Every IT Administrator Must Review
20 min read
Microsoft 365 Security Hardening Guide: 50 Critical Settings Every Business Should Enable
25 min read