A Step-by-Step Guide to Setting User Locale and Time Zone Preferences in Microsoft 365

Setting the correct locale and time zone preferences for users in Microsoft 365 is essential for ensuring that everyone has a personalized experience. Accurate locale and time zone settings help in displaying the correct date formats, times, and languages, enhancing overall productivity. This blog outlines the steps to configure these settings effectively.
Why Locale and Time Zone Matter
When users operate in a global environment, having the right locale and time zone settings is critical. It ensures that meetings are scheduled at appropriate times, emails are sent with the correct timestamps, and documents reflect the correct date formats. This minimizes confusion and enhances collaboration among team members across different regions.
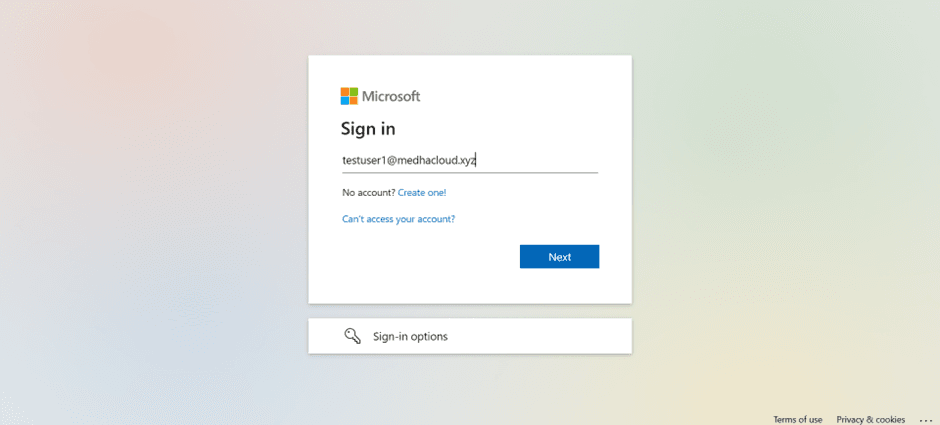
Step 1: Sign in to Microsoft 365 Admin Center
- Navigate to the Microsoft 365 Admin Center.
- Sign in using your admin credentials.
Step 2: Access User Settings
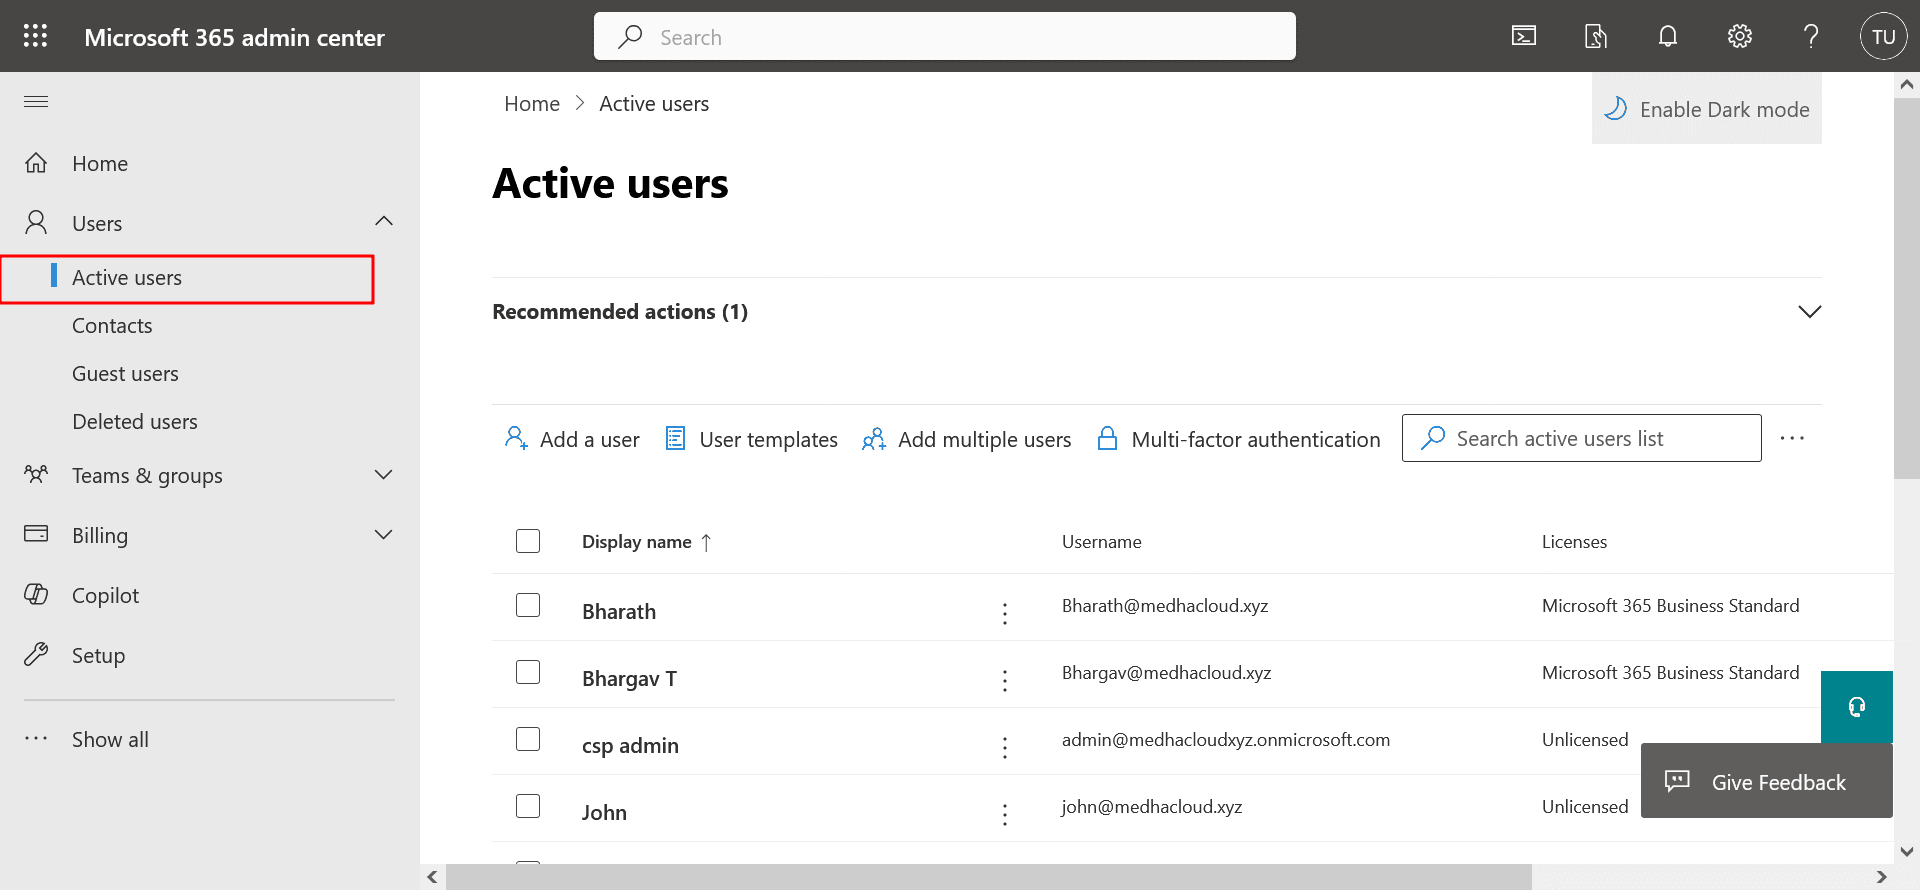
- In the left-hand menu, click on Users.
- Select Active users to view all users in your organization.
Step 3: Choose the User
- Find the user whose locale and time zone preferences you want to set.
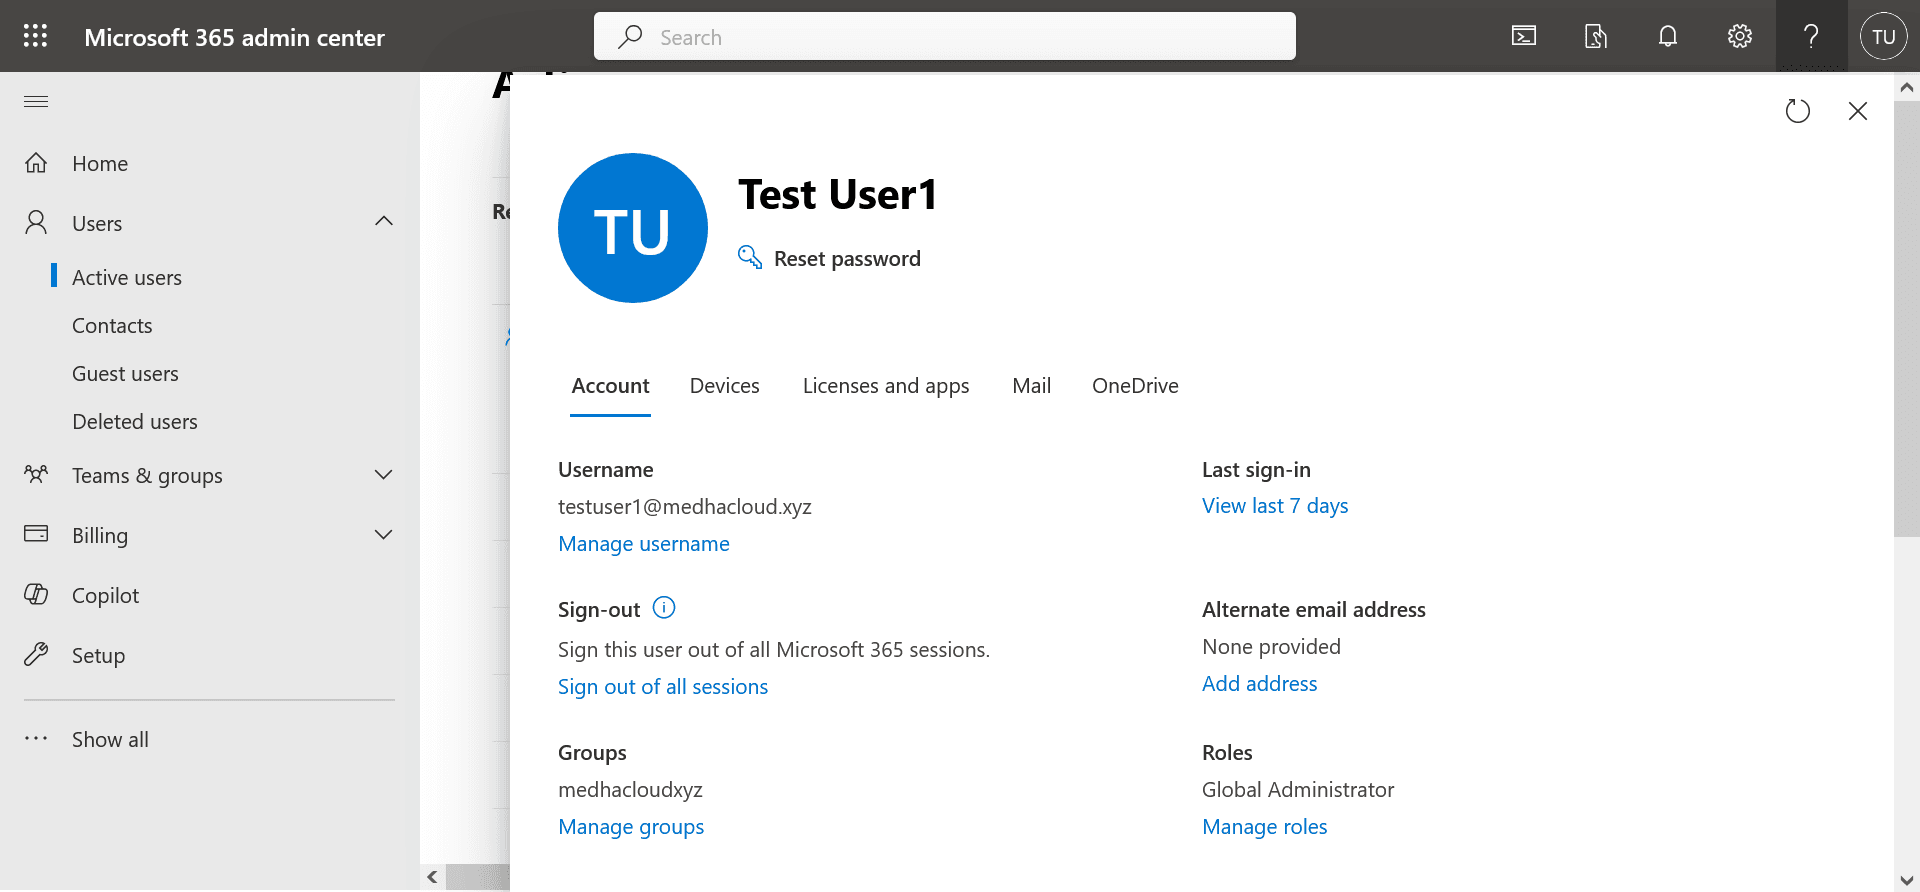
- Click on the user’s name to open their account settings.
Step 4: Modify Locale and Time Zone Settings
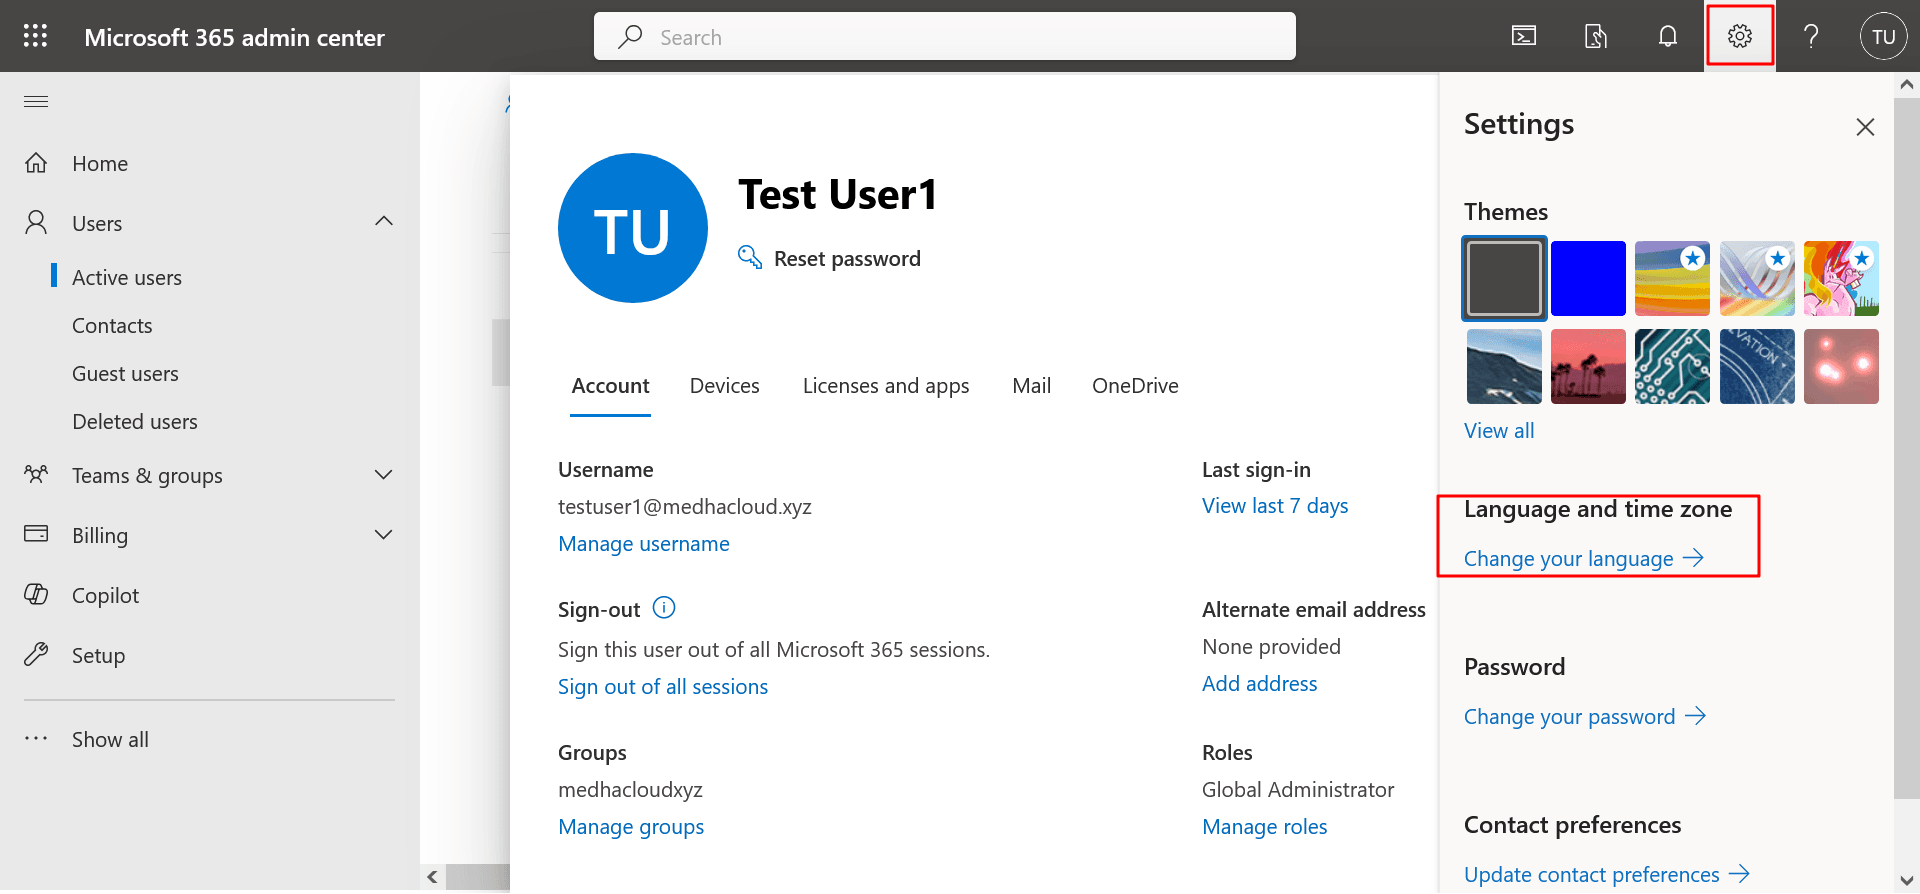
- In the user settings pane, click on Settings.
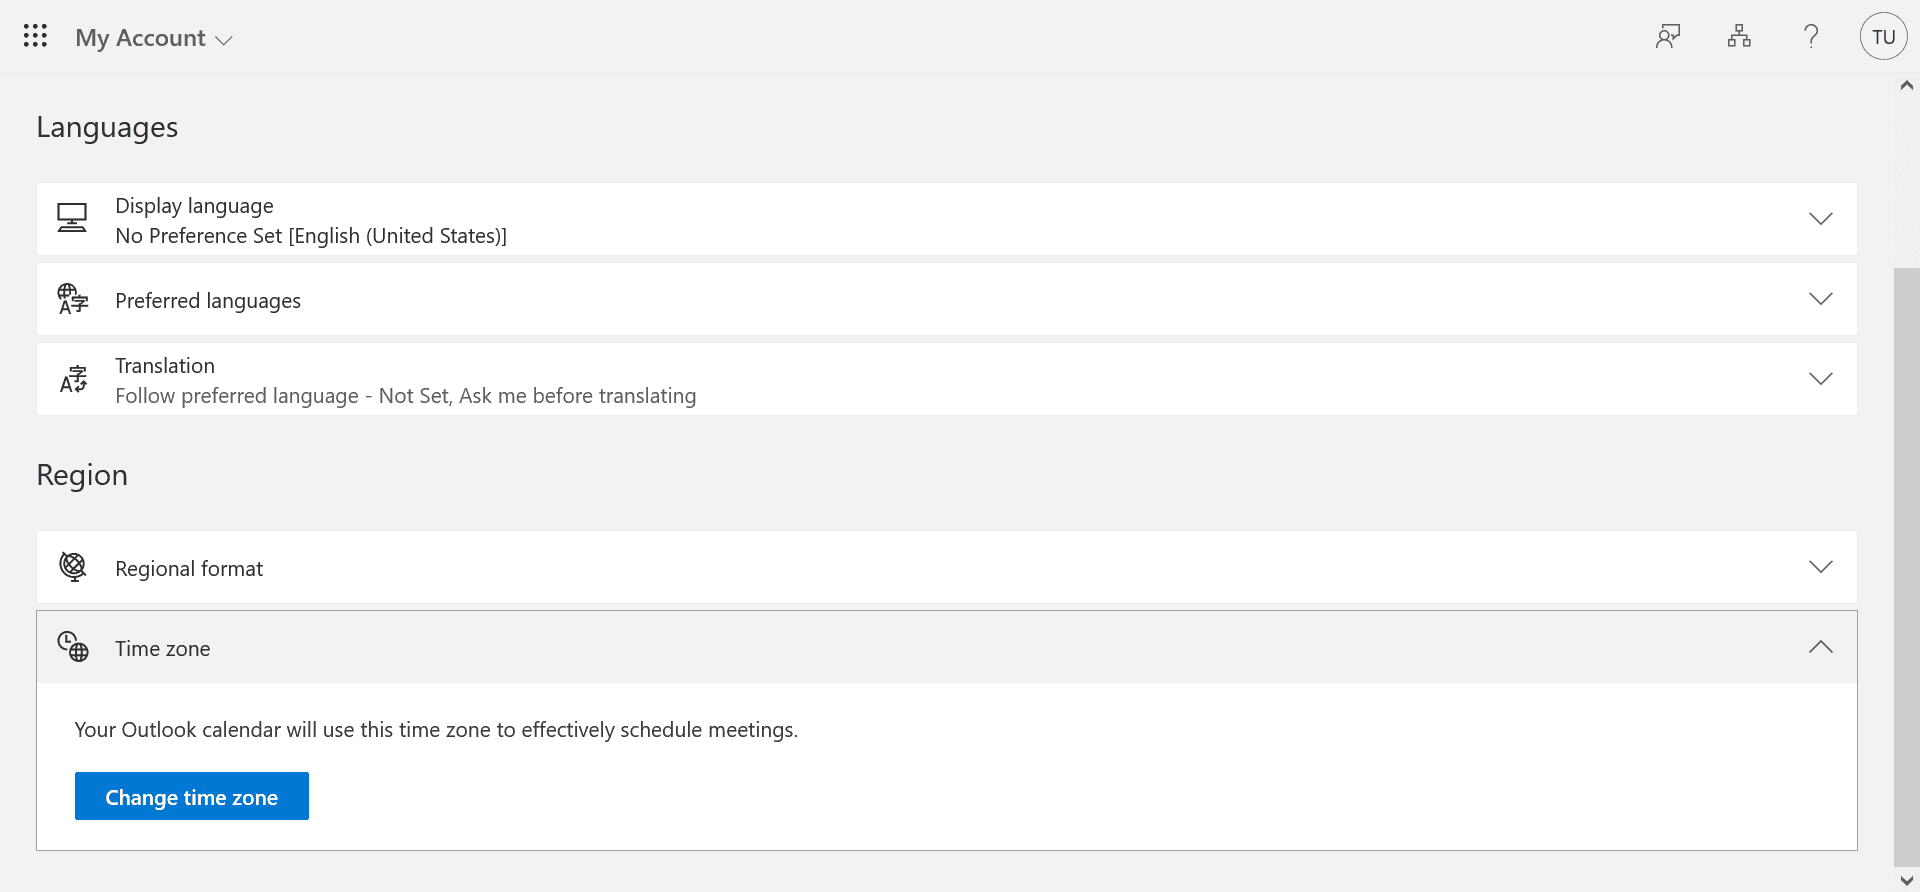
- Locate the Language and Time Zone section.
- Set Locale:
- Choose the preferred language from the dropdown menu that corresponds to the user's locale. This selection will affect how dates, times, and numbers are formatted.
- Set Time Zone:
- Select the appropriate time zone for the user from the available options. This setting is crucial for scheduling meetings and events accurately.
Step 5: Save Changes
- Ensure all modifications are saved before exiting the settings pane. A confirmation message should appear indicating that the changes have been successfully applied.
Step 6: Verify Settings
- After saving, you can verify the changes by checking the user’s profile.
- Optionally, inform the user to ensure they see the updated settings and understand how to adjust them in the future.
Additional Considerations
- Regular Updates: Periodically review user locale and time zone settings to accommodate any changes in user roles or locations. This is especially important for organizations with remote teams across different regions.
- Training and Support: Provide training materials or resources to help users understand how to adjust their own settings when needed. Consider creating a short video tutorial or a step-by-step guide to assist users.
- Monitoring: Use administrative tools to monitor compliance and ensure that all users have the correct settings. This will help maintain consistency across the organization.
Final Thought
Accurate locale and time zone settings are essential for optimizing the user experience in Microsoft 365. These settings ensure that meetings, emails, and documents are aligned with regional formats, reducing confusion and enhancing collaboration. By following the outlined steps, organizations can easily configure these preferences to foster productivity and maintain consistency across global teams.
At Medha Cloud, we understand the complexities of managing Microsoft 365 environments. Our team provides tailored solutions to help you streamline administrative tasks, including locale and time zone configurations, ensuring your organization operates efficiently.
Partner with Medha Cloud to take full advantage of Microsoft 365's capabilities and unlock seamless collaboration across your workforce.
Contact Medha Cloud Today:
- India: +91 93536 44646
- US: +1 646 775 2855
- Website: medhacloud.com
- Email: info@medhacloud.com
Let Medha Cloud empower your team with a personalized and efficient Microsoft 365 experience.

Roshan R Poojary
Cloud Licensing Specialist • 6+ years
Roshan is a Cloud Licensing Specialist with deep expertise in Microsoft 365 and Google Workspace subscription management. He helps businesses optimize their cloud licensing costs and assists help desk teams in resolving complex subscription issues.
