
To get the most out of the Google calendar and resources, you have to list all the buildings in the organization as it is eh foundation for all the resources. This blog guides you step by step explanation on how to add Buildings and Resources in the google admin console.
Internet Connection.
G suite admin access
G Suite subscription
Step 1 : Google Admin Login
Go to admin.google.com and login with your credentials.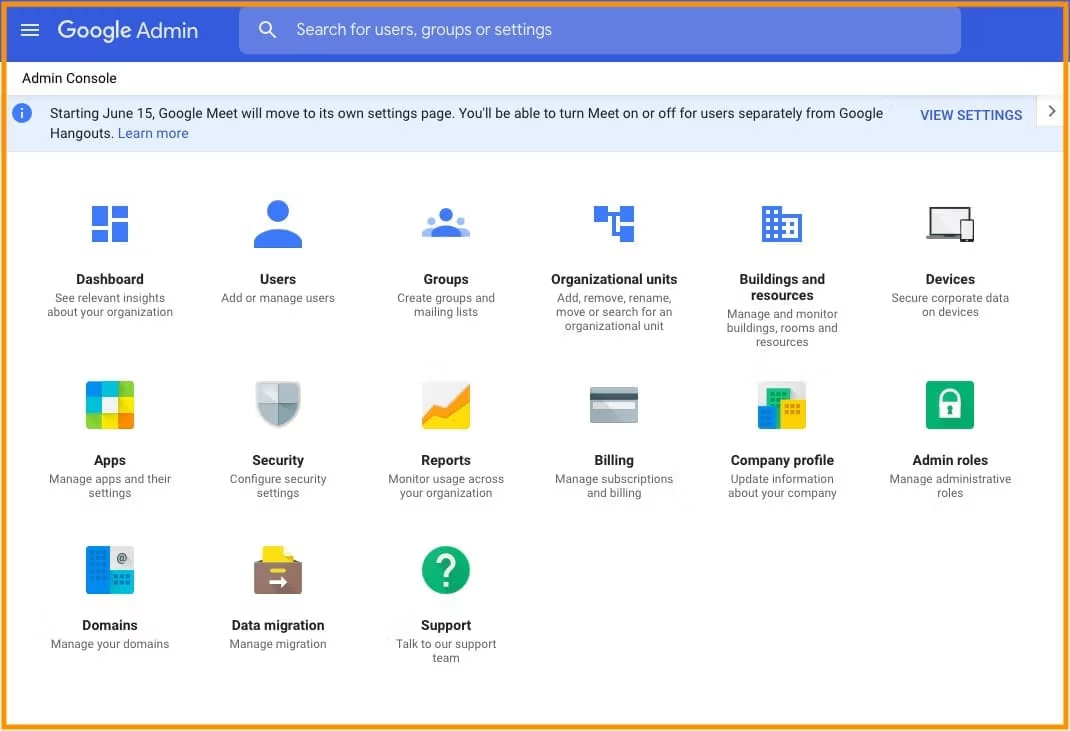
Step 2 : Building and resources
In the Admin Console page, Click on Buildings and Resources.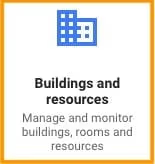
Step 3 : Resource management
Go to Resource management and Click “Open”.
You will find a Dropdown on the Top of the page, navigate your mouse cursor to that, and click on it.

Step 4 : Buildings
Select Buildings, which is the second option in the dropdown menu.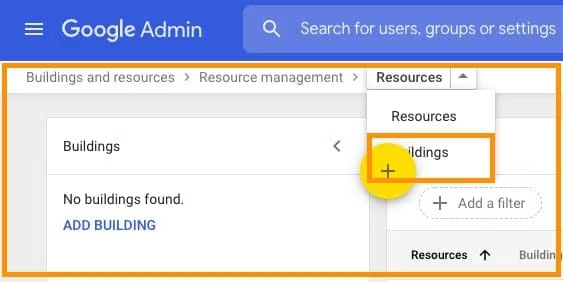
Step 5 : Add Buildings
To add Buildings in bulk, there is a Plus symbol on Top Left, as shown. Once you place your mouse cursor on that “Plus” symbol, a second hidden “upload symbol” magically appears. Click on that for Bulk uploads.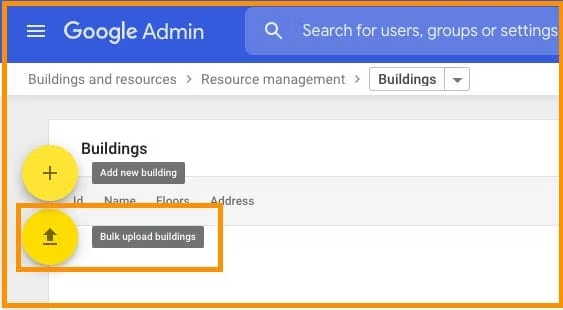
Step 6 : Upload building data
You will see a Pop up, upload your CSV file and click “UPLOAD”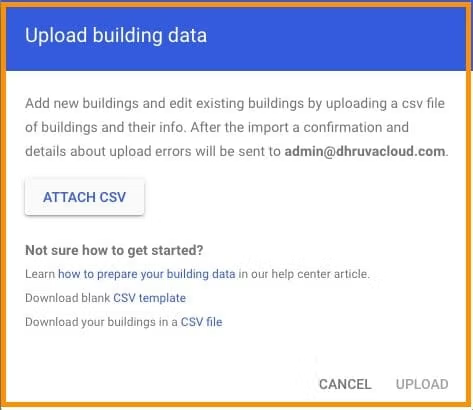
Step 7 : Add building individually
To add buildings individually, Click on “PLUS” symbol on Top left corner.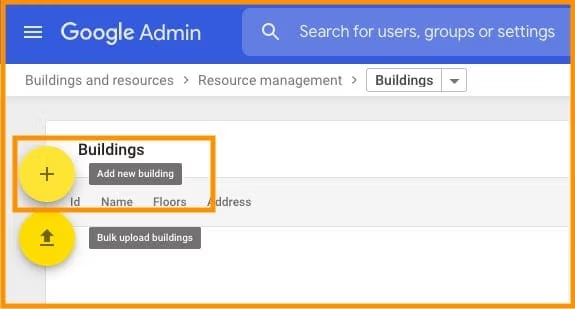
Step 8 : Add ID
You will get a popup, Fill the details, and click ADD BUILDING. Note that ID will be automatically generated if you just type the name. Or you can add your ID as you want.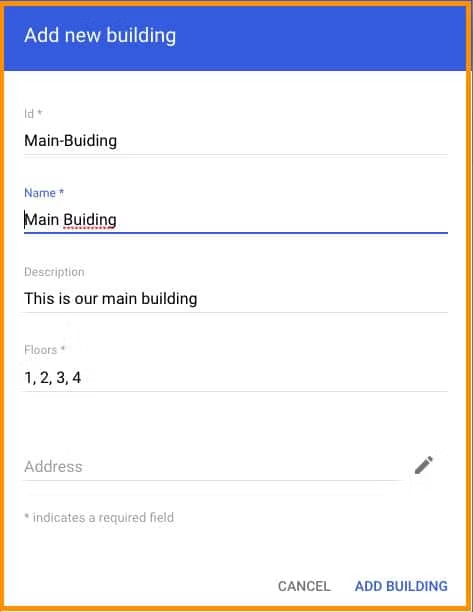
Step 9 : Add Address
Fill in the address by clicking the PENCIL symbol to the right of address column and click DONE after filling the details.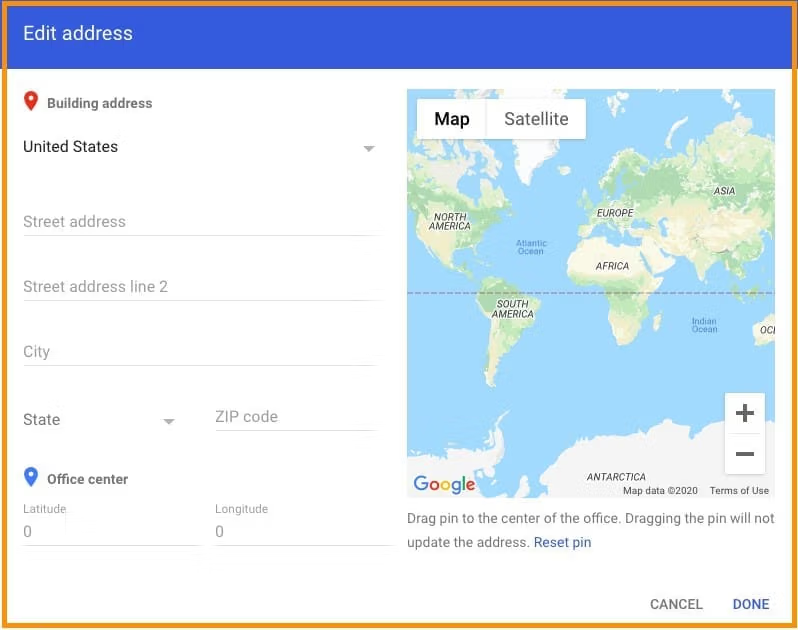
Step 9 : Add new building
Click on “Add new building”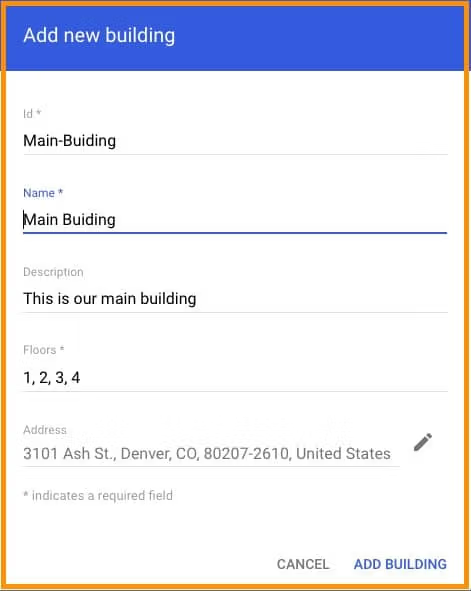
Step 12 : Add Bulk Resources
To add Resources in bulk, there is a Plus symbol on Top Left as shown. Once you place your mouse cursor on that Plus symbol, a second hidden upload symbol magically appears. Click on that for Bulk uploads.
Step 13 : Resource upload
Attach the CSV file and click Upload.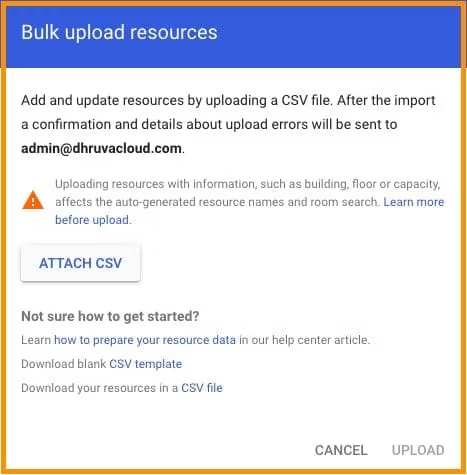
Step 14 : Add Resource Individually
To add resources individually, Click on PLUS symbol on Top left corner.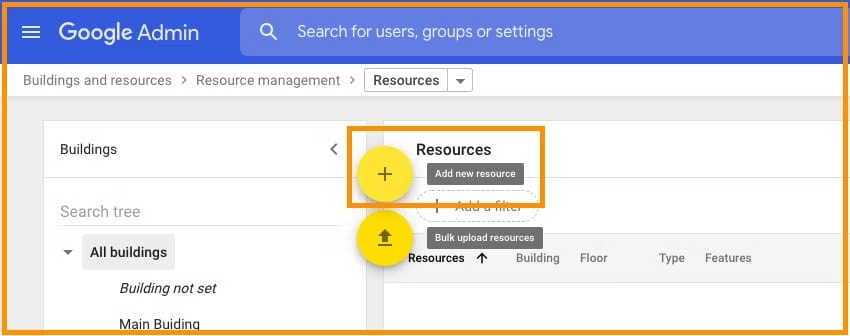
Step 15 : Add New Resource
You will get a popup, fill in the details, and Click ADD RESOURCES.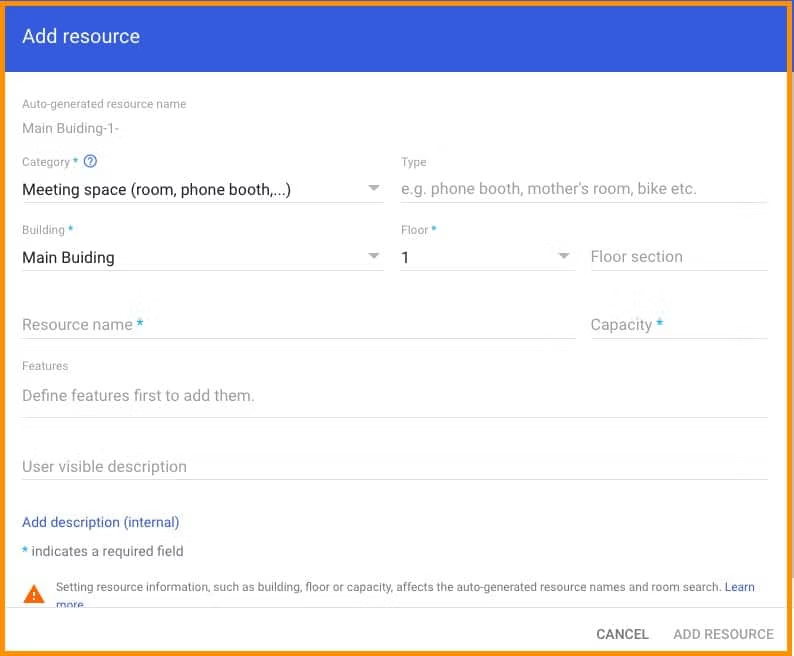
Conclusion:
Hope you understand how to add buildings and resources in G Suite. Follow the guide and learn yourself easily. However, if you need any support for Installing and exploring G Suite features and its capabilities, feel free to contact Medha Hosting.
Read Here: How To Manage G Suite Users Using GAM? (Google Apps Manager)

