We’re very happy to come up with a new topic”How to Install LAMP in CentOS?
We love your sheer enthusiasm for more questions and inquiries, and we also like to resolve your doubts, misconceptions, and deadlocks about tech subjects.
I hope you saw my previous document for ‘Server hardening on CentOS.’
Today, we have something new and exciting for you.
Here in this tutorial, I am explaining how to install up LAMP stack on centos.
A lot of people have the struggle in Installing LAMP stack on CentOS; we hope to make understood the document for your requirement.
LAMP represents a group of software applications that are used together to run a dynamic website,
LAMP represents the Linux operating system with Apache Web server. The website data is stored in the MySQL/MariaDB database, and dynamic content is processed by PHP.
If you do not have time to do all these Linux administration tasks, please check our Managed Linux Server Administration Services.
Yes, the process for installing LAMP stack on Debian can be used for Debian 11 as well. The steps for installing Apache, MySQL, and PHP on Debian 11 are generally the same as for CentOS. This provides a consistent approach to setting up a LAMP environment across different Linux distributions.
1. VPS/Dedicated server
2. Root access on your server
3. Internet worked on your server
We are installing the software using sudo command so that we can temporarily get administrative privileges.
sudo yum update -y
After that check your hostname as per FQDN
hostname
hostname -f
EX: server.domain.com
The Apache web server is currently the most popular web server in the world, which makes it a great default choice for hosting a website.
sudo yum install httpd -y
After successful installation, you can start and enable service
sudo systemctl start httpd.service
sudo systemctl enable httpd.service
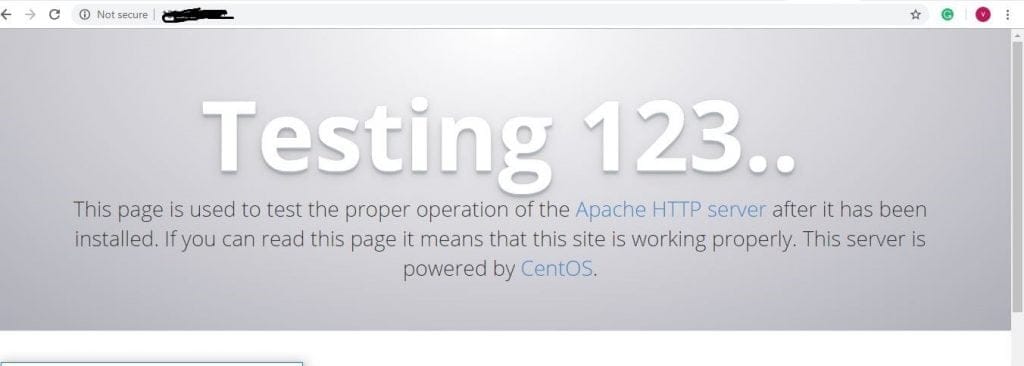
Now it’s going to your favorite web browser and enter your public IP and check installation is working or not.
http://your_ip/

Now, we have our web server up and running, it is time to install MariaDB, a MySQL drop-in replacement. MariaDB is a community-developed fork of the MySQL relational database management system. It will organize and provide access to databases where our site can store information.
MariaDB is a forked version of MySQL. It is an open source software application developed by a community that wants it to remain free for everyone.
We will need MariaDB to store information for our dynamic websites. We can install MariaDB together with additional packages that we require on our CentOs server by running the commands below:
sudo yum install mariadb-server mariadb -y
After successful Installation, you can start service
sudo systemctl start mariadb
By default, our MariaDB is not secure by default; we need to remove the anonymous user and test database and configure other settings by running the command below:
sudo mysql_secure_installation
You will be prompted to enter your MariaDB root password; just press Enter because you haven’t set any password yet. Further, please note that this should not be confused by the root password of your server.
Once you have done this, you will be asked a series of questions. We have provided the answers below for simplicity:
Set root password? [Y/n] Y
New password: Enter your password here
Re-enter new password: repeat your password
Remove anonymous users? [Y/n] Y
Disallow root login remotely? [Y/n] Y
Remove test database and access to it? [Y/n] Y
Reload privilege tables now? [Y/n] Y
Success!
Cleaning up…
All done! If you’ve completed all of the above steps, your MariaDB Installation should now be secure.

Then your MariaBD server is secure after you can enable service.
sudo systemctl enable mariadb.service
PHP is a general-purpose server-side scripting language. Moreover, PHP works together with HTML to display dynamic content on your website. Additionally, It has the correct drivers for connecting to the MariaDB database management system that we have installed above.
sudo yum install php php-mysql -y
After Successful Installation restarts web server one more time.
sudo systemctl restart httpd.service
We will call this script info.php. For Apache to find the file and serve it correctly, it must be saved to a very specific directory, which is called the “web root.”
sudo nano /var/www/html/info.php
Add below lines in the script.
<?php
phpinfo();
?>
after that save and exit.
If you are running a firewall, run the following commands to allow HTTP and HTTPS traffic:
sudo firewall-cmd –permanent –zone=public –add-service=http
sudo firewall-cmd –permanent –zone=public –add-service=https
sudo firewall-cmd –reload
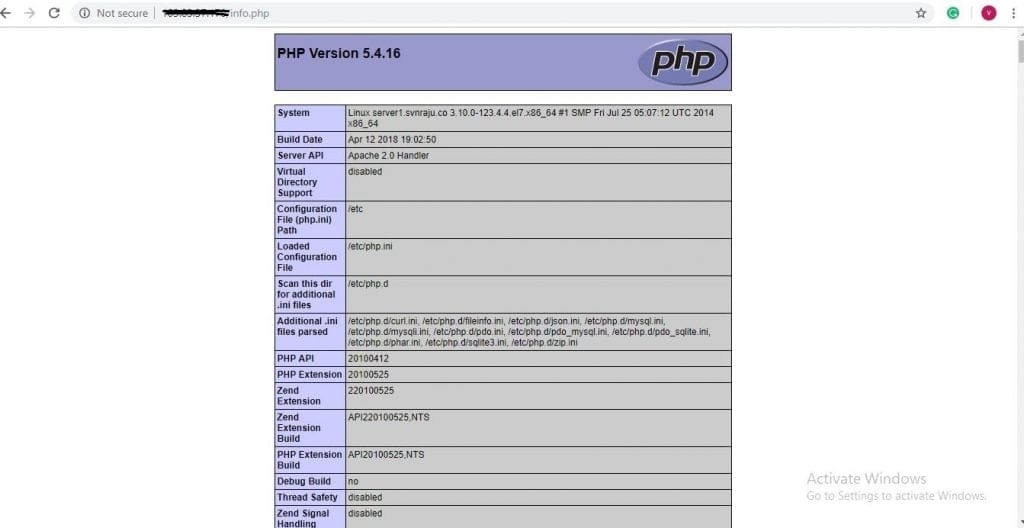
After successful adding port, you can check your web browser
http://ip_adress/info.php

That’s it, we have successfully installed the LAMP stack on CentOS 7 server. We hope you found this tutorial helpful.
Now, try doing it yourselves, it as easy as a pie.
Also, if you’re having any trouble doing it and if you have any doubts and quires on the servers and IT management feel free to reach our technical team @ medhahosting
See you again…

