Step-by-step guide to setting up Shared Drives in Google Drive-2024

Set up Shared Drives in Google Drive to make file collaboration easier for your organization. Google Workspace administrators can enable content editors to transfer files to Shared Drives, allowing seamless collaboration. Users can also move existing files to Shared Drives, but it’s important to note that doing so may give members access to sensitive information. In this blog, we’ll walk you through how to set up a Shared Drive in Google Drive
Total time needed: 30 Minutes
Required tools:
Things needed:
Table of contents
What is a Shared Drive in Google Workspace?
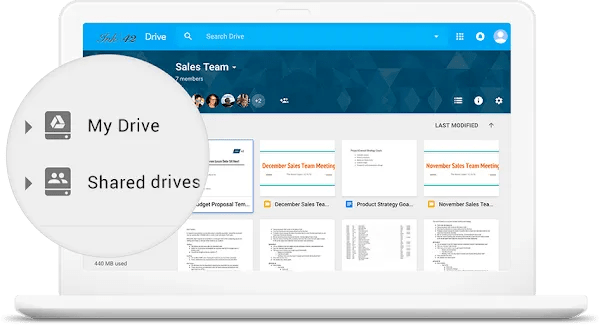
Before diving into the steps, it’s important to understand what a Shared Drive is. Unlike My Drive, where files are owned by individual users, a Shared Drive is owned by the organization. This means the files within a Shared Drive remain with the company, even if a user leaves. Shared Drives are particularly useful for teams that collaborate frequently, as they provide centralized access to important documents, spreadsheets, and presentations.
Steps to set up Shared Drives in Google Drive setting
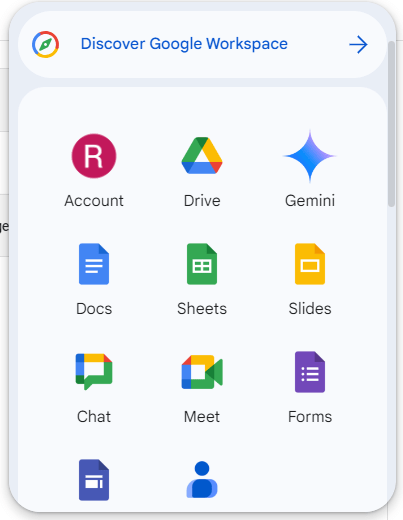
Step 1: Log in to Admin Console
- Go to admin.google.com and log in with your admin credentials.

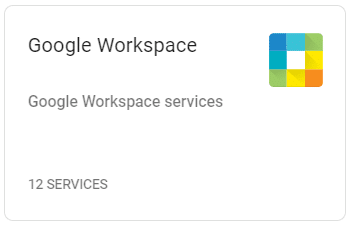
- Navigate to Apps > Google Workspace > Drive and Docs.
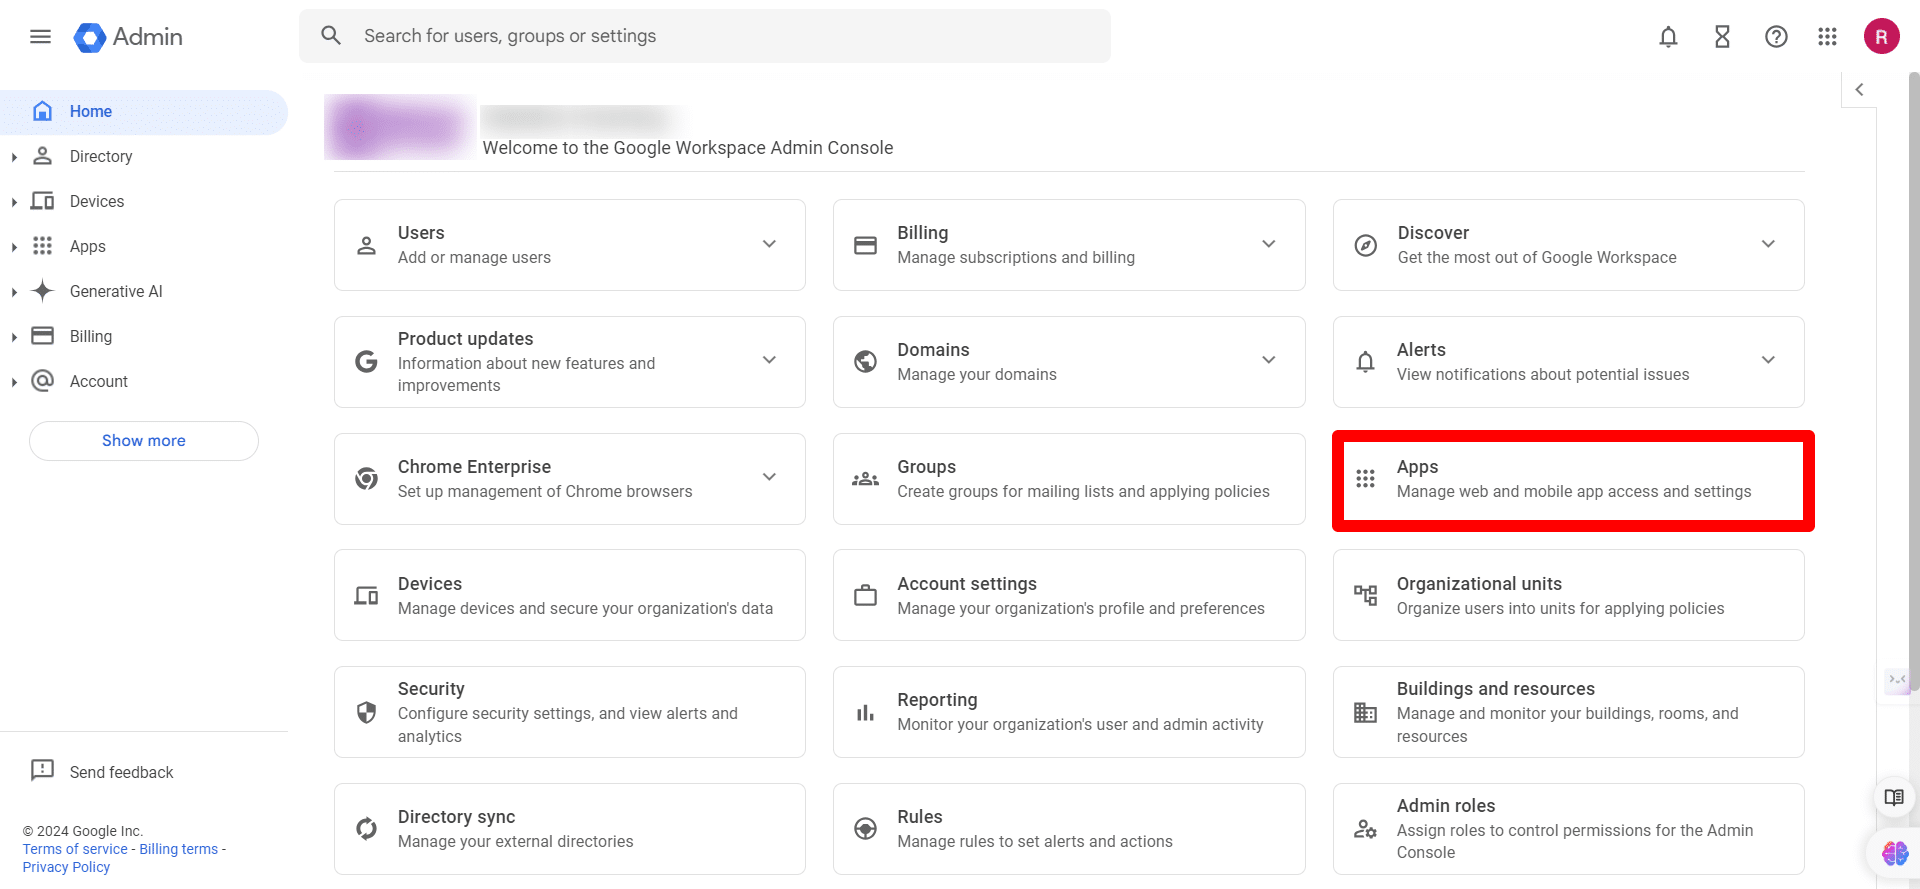
- Select Drive and Docs
![]()
Step 2: Manage Shared Drives
- In the Drive settings, go to Managed shared drives.
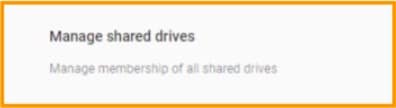
- Click on the three-dot menu (upper-right corner).
![]()
- Select Drive
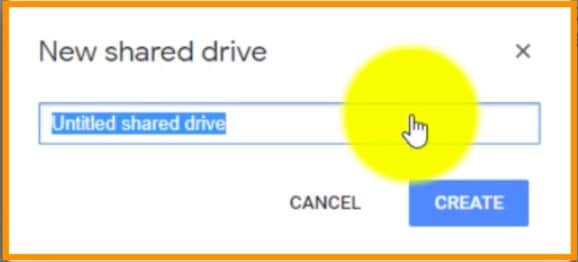
Step 3: Create Share Drive
- Click on CREATE SHARED DRIVE, which can be found in the middle of the page

- Enter the name that you want your drive to be and click CREATE
- After the drive is created to Add members, Select the drop-down, as shown in the image, and click on Add members.
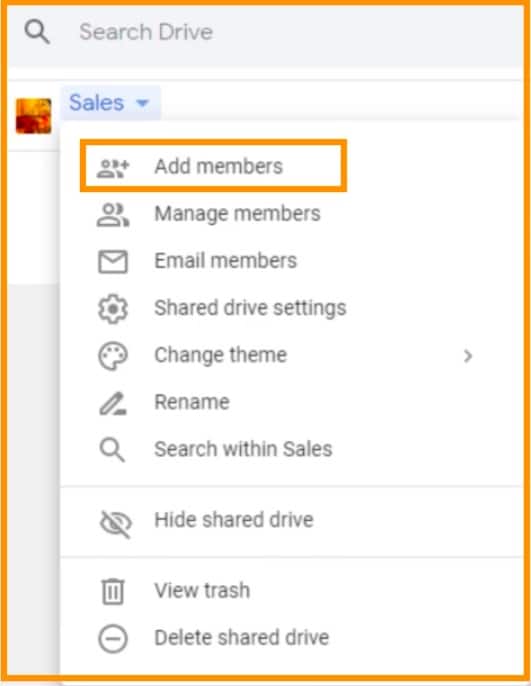
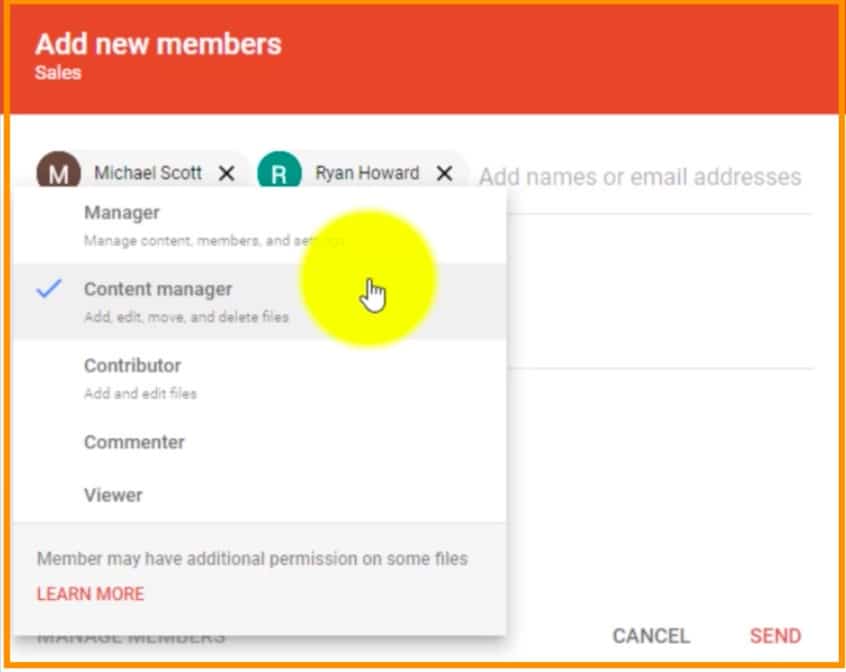
Step 4: Add new members
- Fill in the details of the new member to be added.
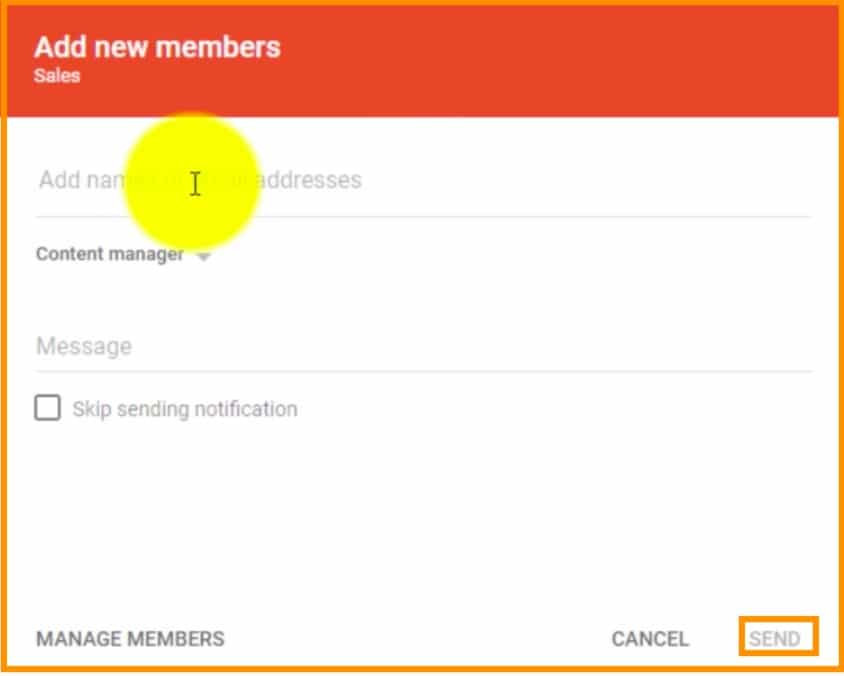
- From the drop-down below the name, Select the positions of the members and click on SEND. Your members would have been added by now
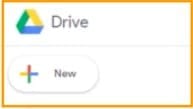
Step 5: Add New file to Drive
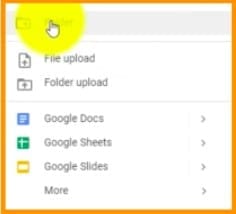
- To add a new file to the drive, click on “NEW” that can be found on the top left of the page
- Select the format of the file that you want to add
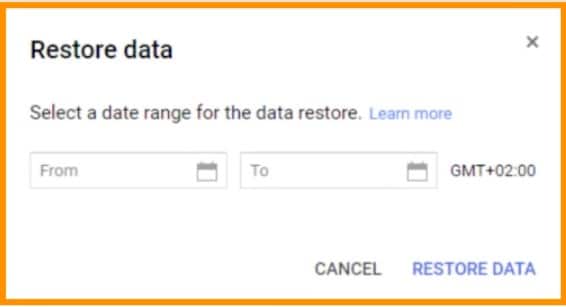
Step 6: Restore permanently deleted file
- To restore files that have been permanently deleted by any user, Go to Shared documents and click on restore symbol, as shown in the image.

- Select the date range and click on RESTORE DATA
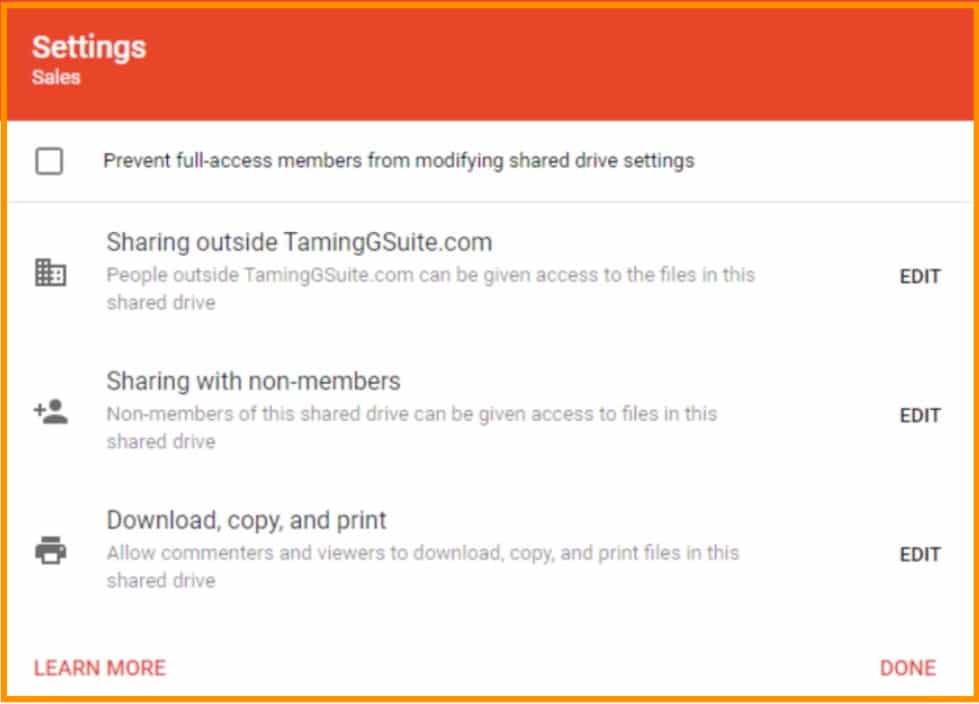
Step 7: Access shared Drive setting
- To access shared drive settings, Select the Settings symbol.

- Modify the settings as per your requirements by clicking the edit button. Click DONE
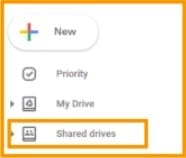
Step 8: Change cover image of Drive folder
- To change the cover image of the drive folder, Go to shared drives.
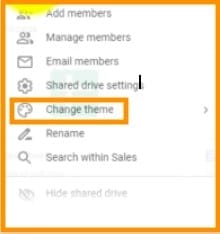
- Select the Drive that you want to edit

- Go to the drop down and select change theme, and you can choose from available pictures or upload your custom image
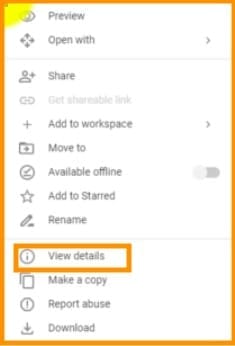
- To view the details of the modifications done on a file, right-click on the required file, and select View details
Conclusion:
Setting up a Shared Drive in Google Drive simplifies collaboration and helps teams stay organized. Following this guide will ensure your drive is set up correctly, giving your team seamless access to shared resources. If you need assistance, feel free to contact Medha Cloud for support.
Read Here: How To Set Up Migration Setting In Google Drive?
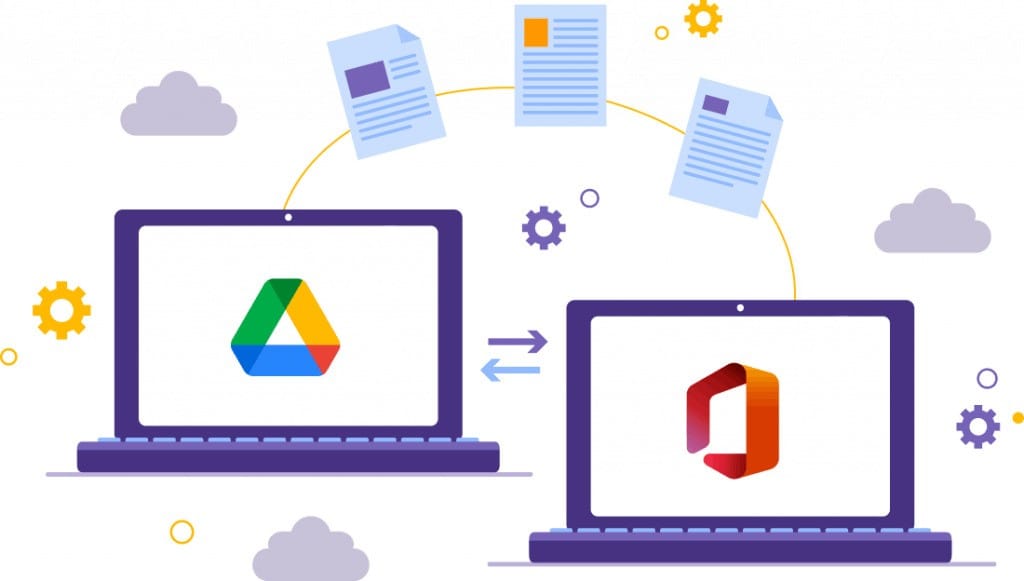
Migrate Gmail, Drive, Calendar, and Contacts to Microsoft 365 with zero data loss.
Google Drive to OneDrive MigrationTopics
Roshan R Poojary
Cloud Licensing Specialist • 6+ years
Roshan is a Cloud Licensing Specialist with deep expertise in Microsoft 365 and Google Workspace subscription management. He helps businesses optimize their cloud licensing costs and assists help desk teams in resolving complex subscription issues.
More in Google Cloud & Workspace
View all
Leaked Business Data Fuels a New Wave of Phishing Against Google Workspace Users
2 min read

Researchers Warn of “Promptware” Attacks That Could Manipulate Google Workspace AI
2 min read
Google Rolls Out Device-Bound Tokens as Session Theft Escalates Across Workspace
2 min read
How to Get Google to Display Images for Phishing Campaigns: A 10-Step Comprehensive Guide
4 min read
Gmail to Office 365 migration: How to proceed?
7 min read
Google Shared Drive Migration to Microsoft 365: A Comprehensive Guide
5 min read