

Hello friends,
Today we are going to discuss MySQL replication in CentOS.
We love your sheer enthusiasm for more questions and inquiries, and we also like to resolve your doubts, misconceptions, and deadlocks about tech subjects.
Especially, today’s question How to setup MySQL replication in CentOS.
Also, I hope you have seen my previous document for ‘Server hardening on CentOS.’
Today, we have something new and exciting for you.
Let’s check, how to set up MySQL and what is the benefits?
Here in this tutorial, I am explaining how to set up MySQL (master-slave) replication on centos.
MySQL replication is a technique by which a master database will be automatically copied to one or more slave databases. Moreover, it helps in making data backup, recovery, and analysis a much easier prospect.
The following guide will walk you through a basic MySQL replication setup using just two servers, one master and one slave.
Further, this can help for some reasons including facilitating a backup for the data, a way to analyze it without utilizing the primary database.
Click here to know more about our database support service
Replication is a feature allowing the contents of one or more servers (called masters) to be mirrored on one or more servers (called slaves).
Before you begin, make sure you have the following:
• 2 servers, both running a fresh installation of CentOS 7
• Root access to both machines
• Server Master IP: xx.xx.xx.xx
• Server Slave IP: xx.xx.xx.xx
Master and Slave are on the same LAN network.
1. High Availability
2.Scale-out
3.Backup servers
4.Disaster Recovery
5.Reporting servers
yum install mysql-server mysql
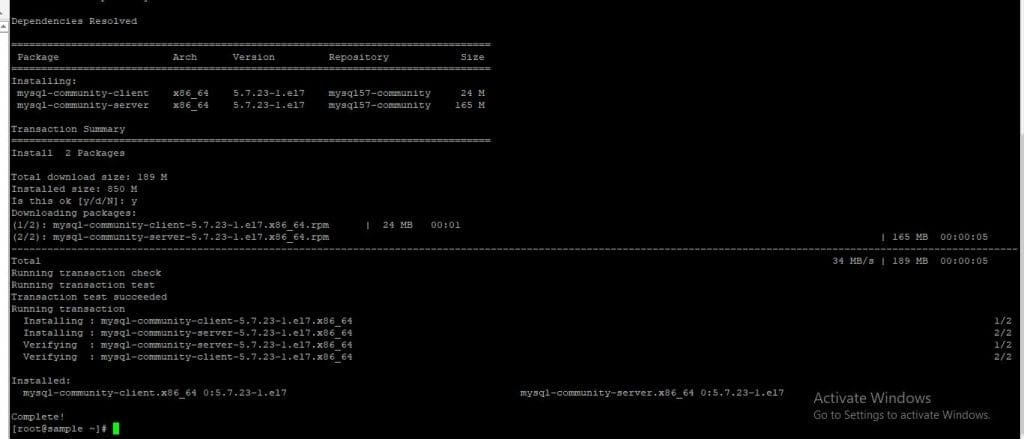
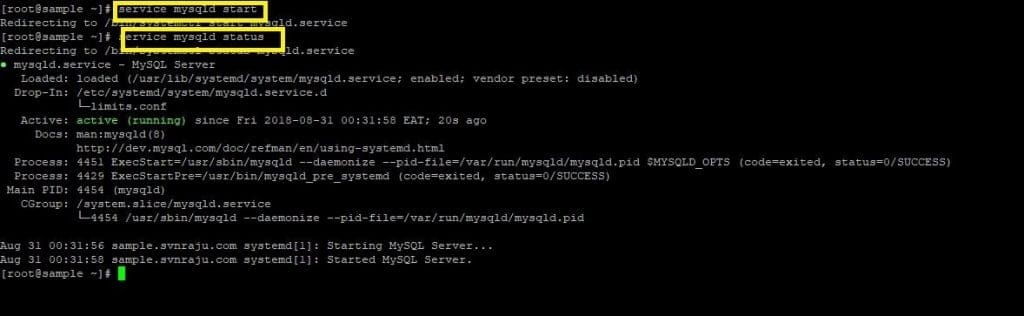
Start the MySQL server.
service mysqld start
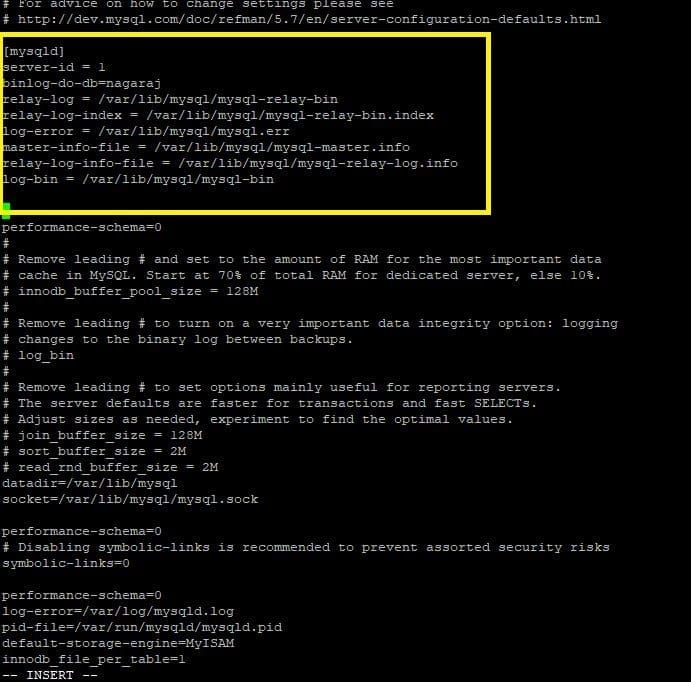
vi /etc/my.cnf
Configure MySQL server
Add the following lines:
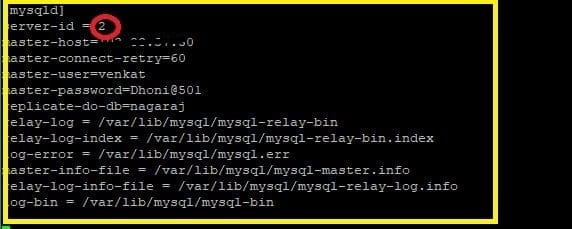
server-id = 1
binlog-do-db=yourname
relay-log = /var/lib/mysql/mysql-relay-bin
relay-log-index = /var/lib/mysql/mysql-relay-bin.index
log-error = /var/lib/mysql/mysql.err
master-info-file = /var/lib/mysql/mysql-master.info
relay-log-info-file = /var/lib/mysql/mysql-relay-log.info
log-bin = /var/lib/mysql/mysql-bin
Restart MySQL server
service mysqld restart

Login into MySQL as root user and create the slave user and grant privileges for replication.
Then, replace slave_userwith user and your_password with a password.
mysql -u root -p

mysql -u root
Mysql> use mysql;
Mysql> show tables;

Mysql> describe user;
You will find the user table, now let’s see its fields:
Surprise! There is no field named ‘password,’ the password field is named ‘ authentication_string.’ So, do this:
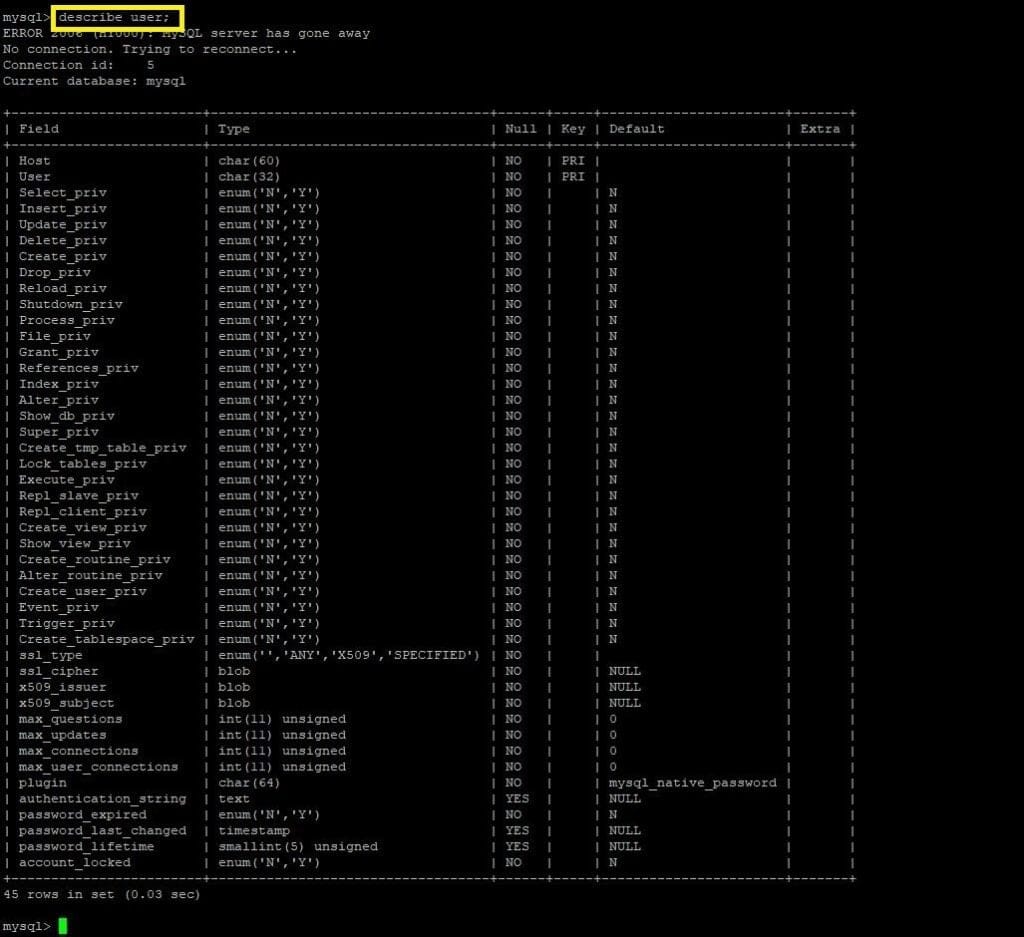
Mysql> update user set authentication_string=password(‘1111′) where user=’root’;
Now, everything will be ok.

Mysql> FLUSH PRIVILEGES;
Mysql> quit;
service mysqld start
mysql -u root -p
mysql> GRANT REPLICATION SLAVE ON *.* TO ‘slave_user’@’%’ IDENTIFIED BY ‘your_password’;
mysql> FLUSH PRIVILEGES;
mysql> FLUSH TABLES WITH READ LOCK;
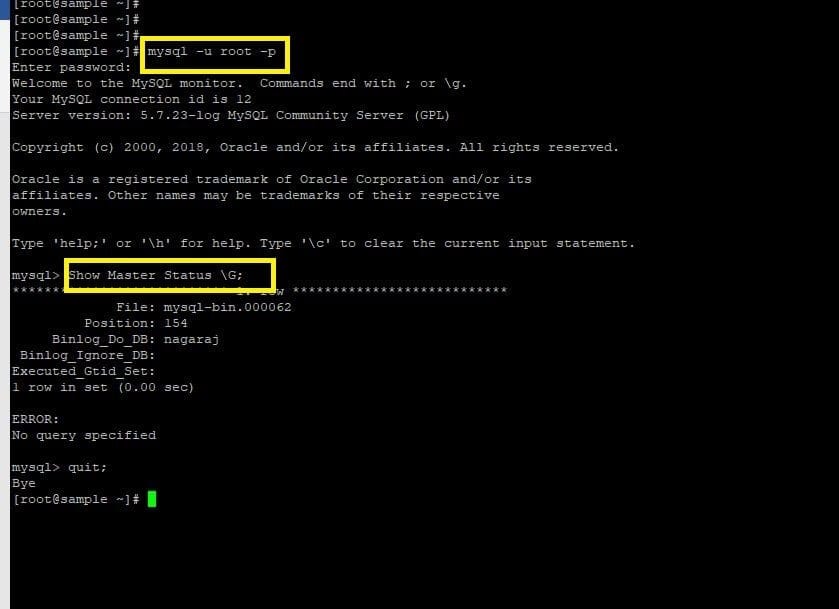
mysql> SHOW MASTER STATUS;
mysql> quit;
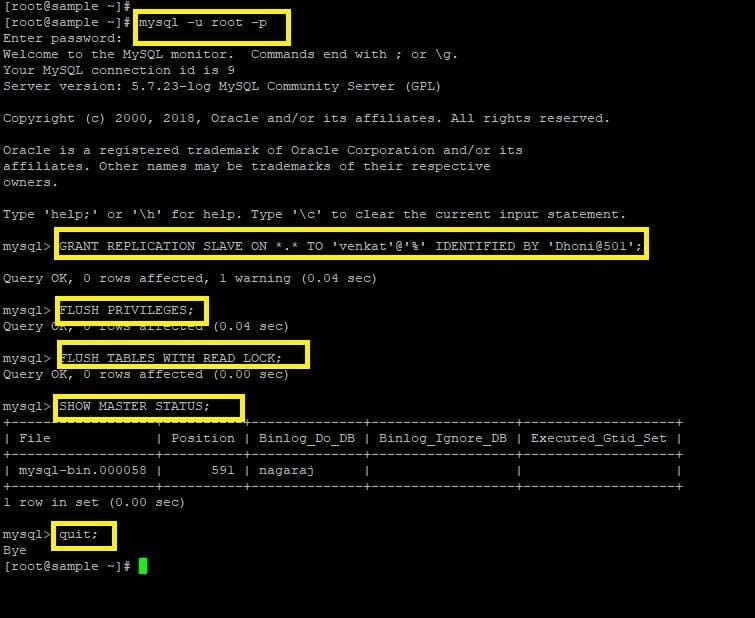
Please write down the File (MySQL-bin.000003) and Position (11128001) numbers; we required these numbers later on the Slave server. Next, apply READ LOCK to databases to export all the database and master database information with mysqldump command.
sqldump -u root -p –all-databases –master-data > /root/dbdump.db

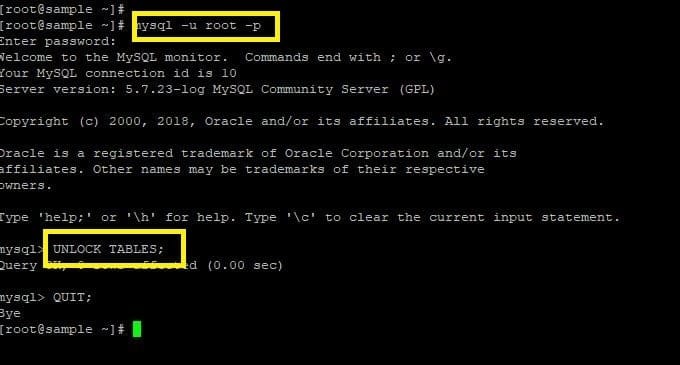
Once you’ve dumped all the databases, now again connect to MySQL as root user and unlock tables.
mysql -u root -p
Mysql> UNLOCK TABLES;
Mysql>quit;
Upload the database dump file on Slave Server (xx.xx.xx.xx) using SCP command.
scp /root/dbdump.db root@slave ip:/root/

That’s it we have successfully configured the Master server, let’s proceed to the Slave server.
Then login your slave server after that
If you don’t have MySQL installed, then install it using YUM command.
yum install mysql-server mysql
After that, once the installation starts with the configuration on the slave server,
vi /etc/my.cnf
service mysqld restart

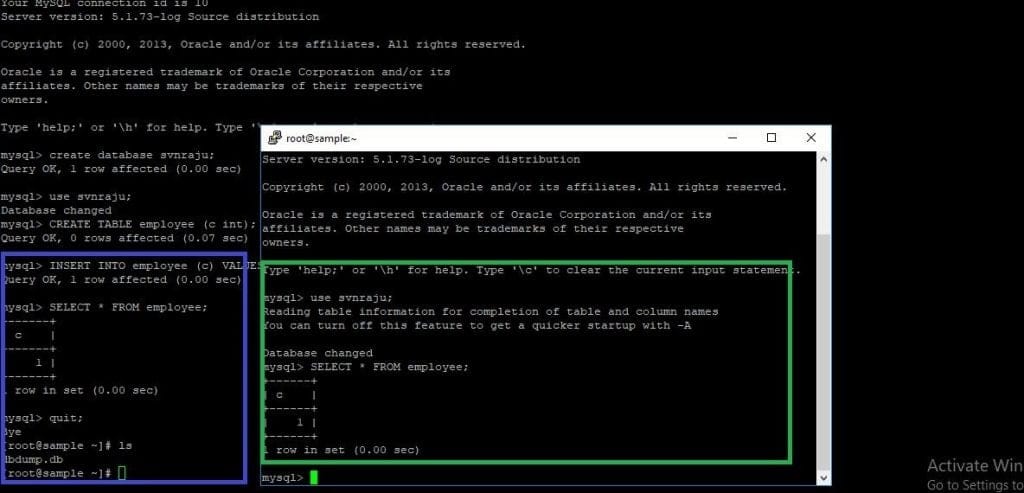
Verifying MySQL Replication on Master and Slave Server
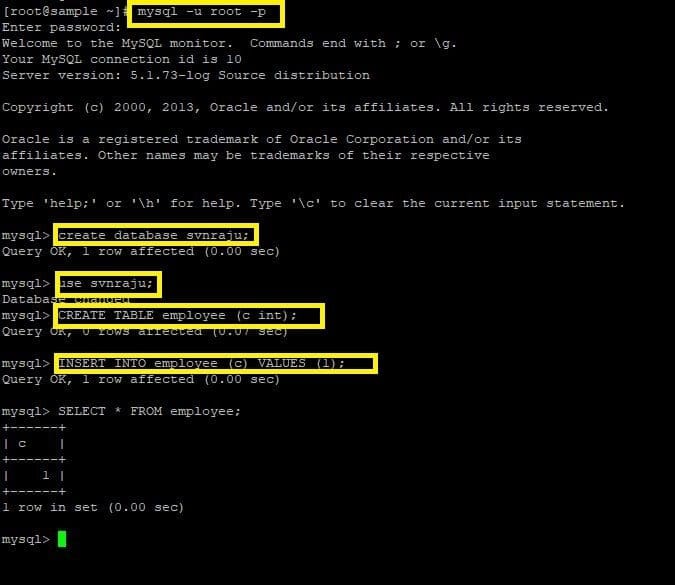
Then, goto master server
mysql -u root -p
mysql> create database svnraju;
mysql> use svnraju;
mysql> CREATE TABLE employee (c int);
mysql> INSERT INTO employee (c) VALUES (1);
mysql> SELECT * FROM employee;
Then goto slave server:
mysql -u root -p
mysql> use svnraju;
mysql> SELECT * FROM employee;
Finally, you have successfully installed and setup MySQL (master-slave). We have made MySQL replication in CentOS.
I hope you’ve got the cuts and turns that you need to take while setting up MySQL.
So, try it yourself and if you come across with the confusion that makes you scratch your heads, just give us a ring, our database administrators will assist you.
In addition, if you need and support on Linux server and database support, Medhahosting is there for you.
Stay tuned, will back with another answer.
