
If you have multiple Google account and access it all from your device, the work data can be controlled by your organization. However, by letting your organization manage your iOS device, you are permitting them to control some sort of data on your device. This blog helps you to set up device management in iOS.
G Suite subscription
Step 1 : Install Google Device Policy App
Go to APPSTORE on the iOS device and search for Google Device Policy app and click OPEN. Accept the required permissions when you get a popup box.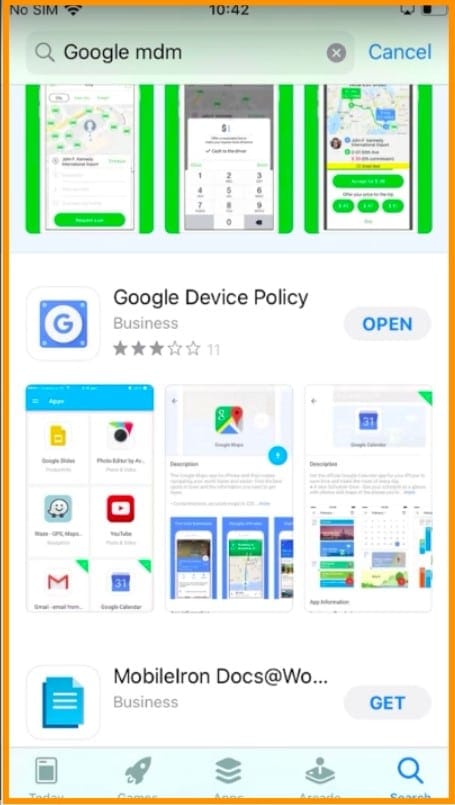
Step 2 : Download and Install Profile
Click the download Symbol, as shown in the image.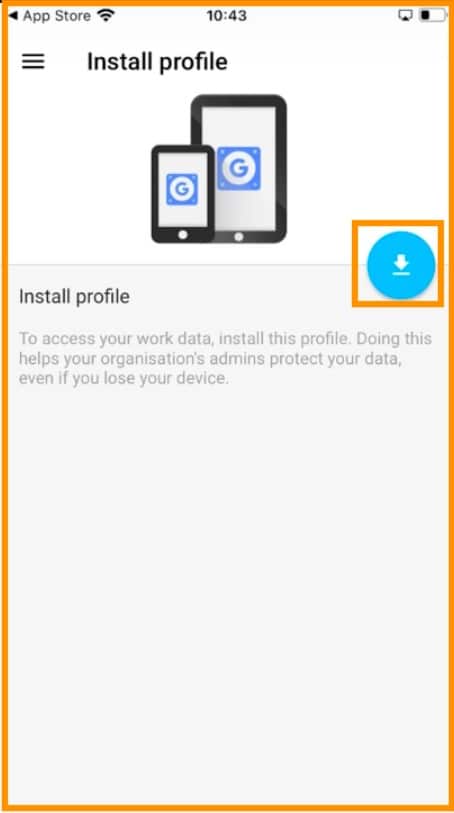
Step 3 : Profile download
Go to settings and click “Profile Downloaded”.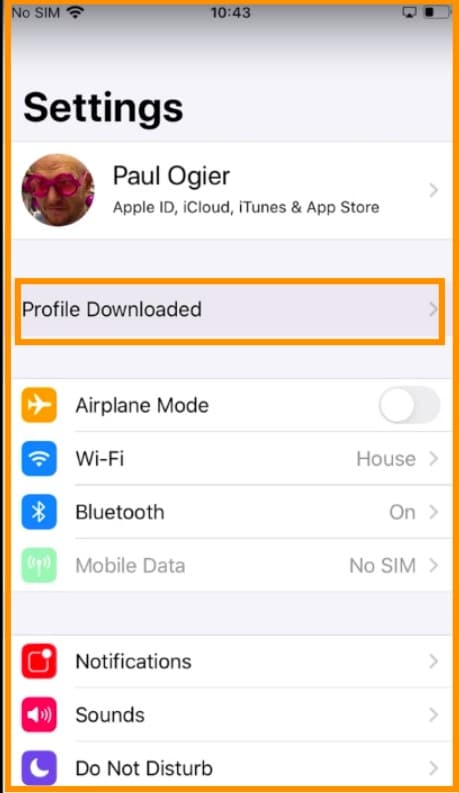
Step 4 : Install profile
Click Install, which is on the top right corner.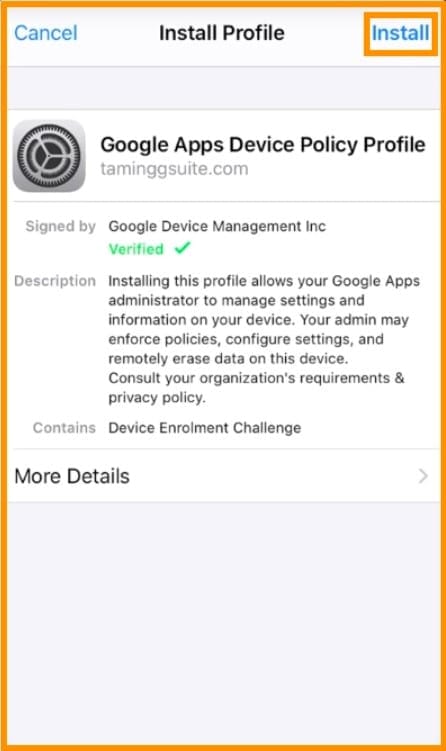
Step 5 : Device management warning
You will get a warning page. Click INSTALL.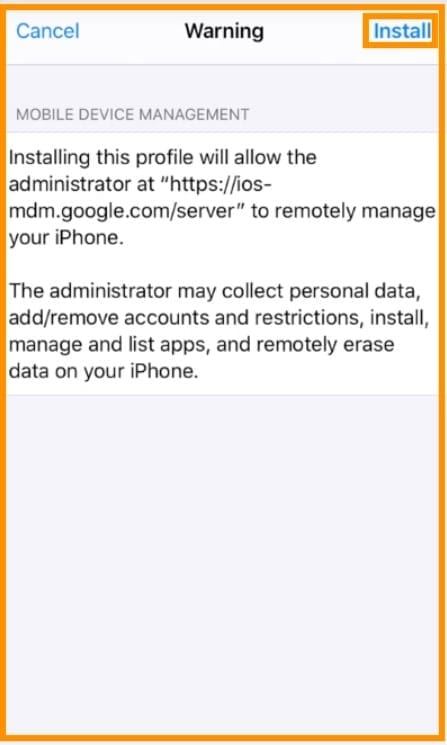
Step 6 : Device trust
Click Trust in the pop up that you get.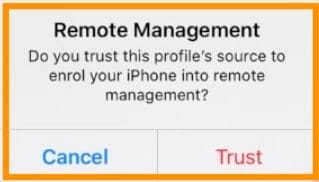
Step 7 : Profile install
Profile is installed now, Click DONE.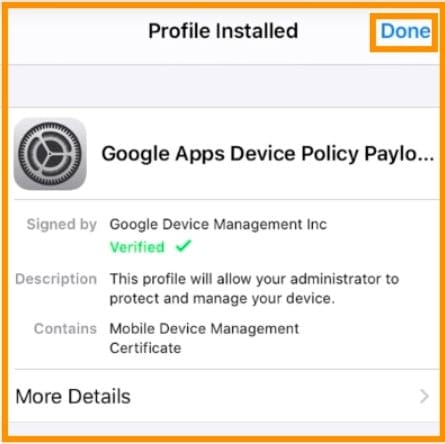
Step 8 : Device management setting
Go to Settings >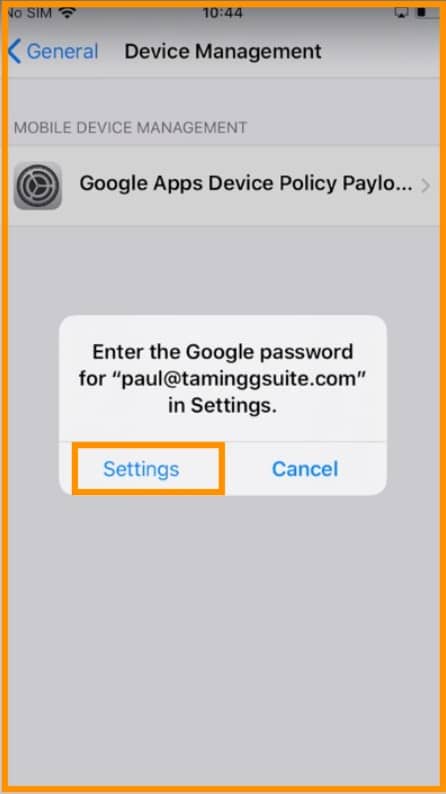
Step 9 : G Suite Account setting
Go to G Suite Account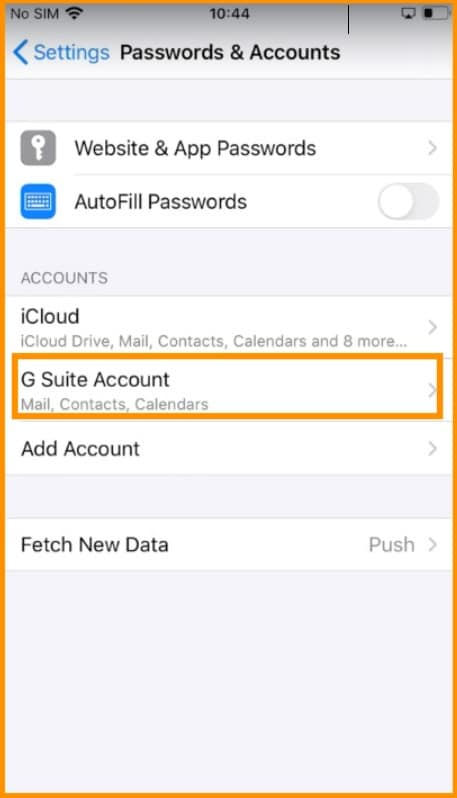
Step 10 : Set password
Click on Re-enter Password and set a password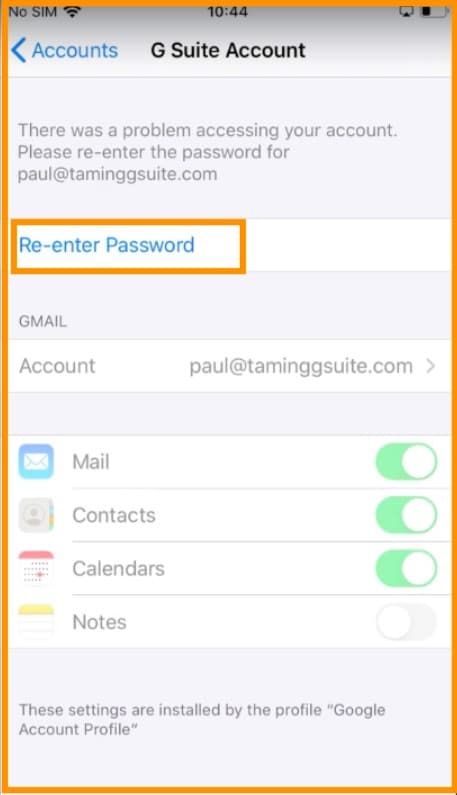
Step 11 : Device passcode
If you did not set a password in the previous step, You would get a popup saying that you will have to set a passcode within 59 minutes. You can set now by clicking “Change now.” Your device would be successfully set up by now.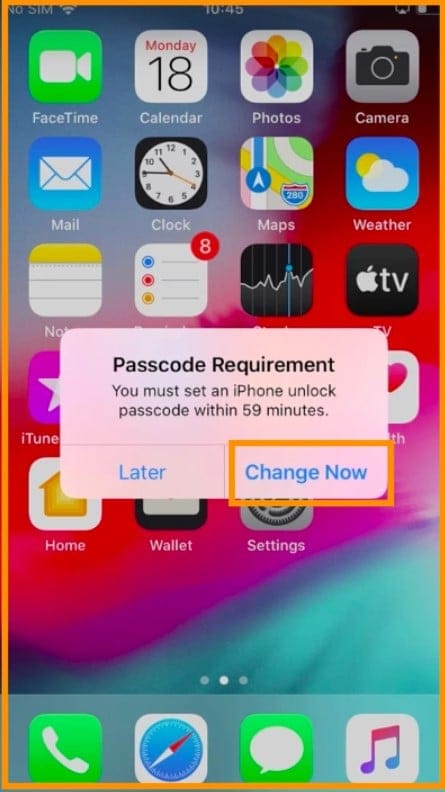
Step 12 : Device check
To check your device, You can log in to your Admin console and click on devices.
Go to Mobile devices.
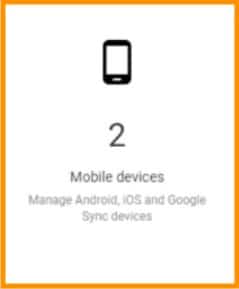
Step 13 : List of devices
To check your device, You can log in to your Admin console and click on devices.
Go to Mobile devices.
Step 14 : Manage device
Click on any device to manage that device.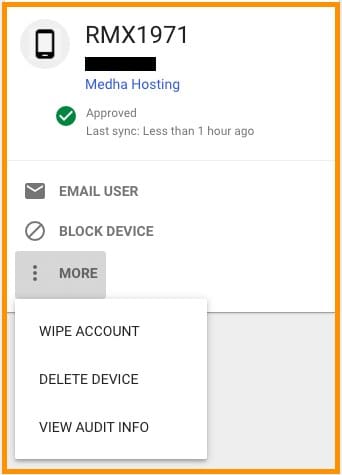
Conclusion:
This way you can add device management in G Suite for your iOS devices. If you have any doubts, please reach us and get expert guidance.
Read Here: Device Management In G Suite (Advanced Set-Up)

