
As part of the personalization freedom for G suite users, G Suite users can create a personalized signature that can be added to their Gmail messages. However, it is not just a Gmail signature for the sake of a trademark, but they can add contact information, business logo, links, and much more.
In a business setting, the G Suite administrator can create a signature for everyone to use. Admin can let the users add images from Google Drive to their Signature as well (all you need to do is turn this on in the Google Admin console).
Follow this guide to learn how to add Gmail signature
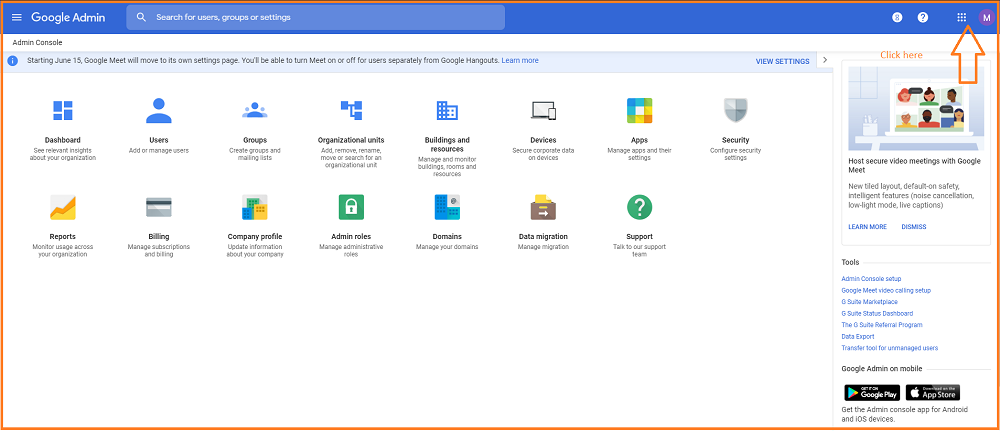
Total Time Needed: 5 Minutes
– A Computer.
– Internet Connection.
G suite admin access
G Suite subscription
Step 1: Log in with Gmail.
You have to log in to your Gmail account to begin the process.
Once you logged in to Gmail, go to “see all setting.”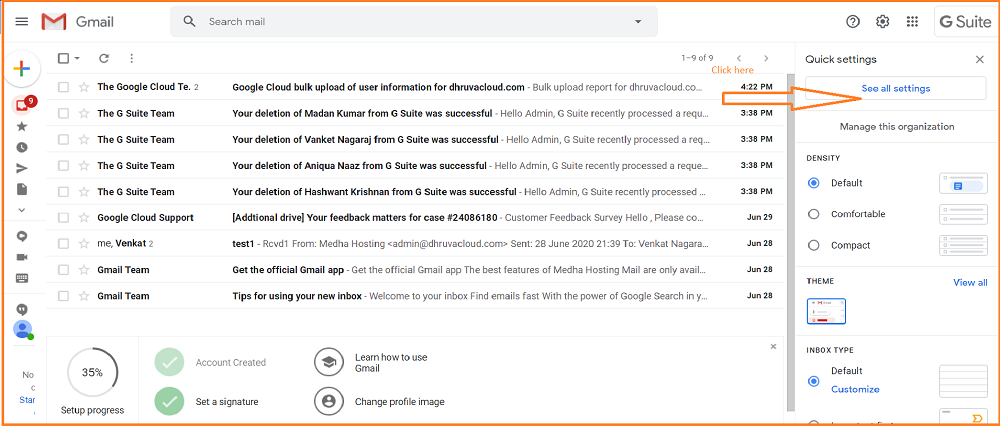
Step 2 : Creating Signature
In the settings, you can find a button “ Create new”
Go to signature option click on “Create new”
There you see a popup box sing the name and write the name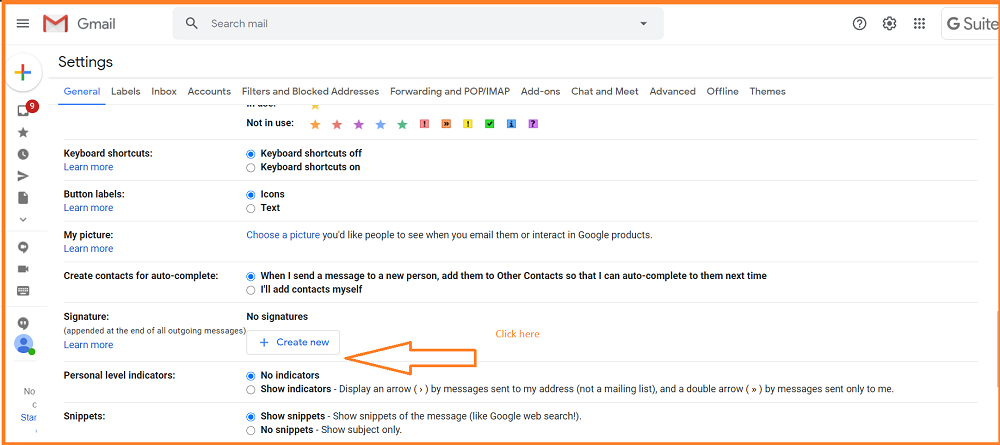
Step 3 : Adding Signature Details
As you can see in the screenshot, there would be a box to add the Gmail signature.
Fill the signature details and “select the name” and click on save changes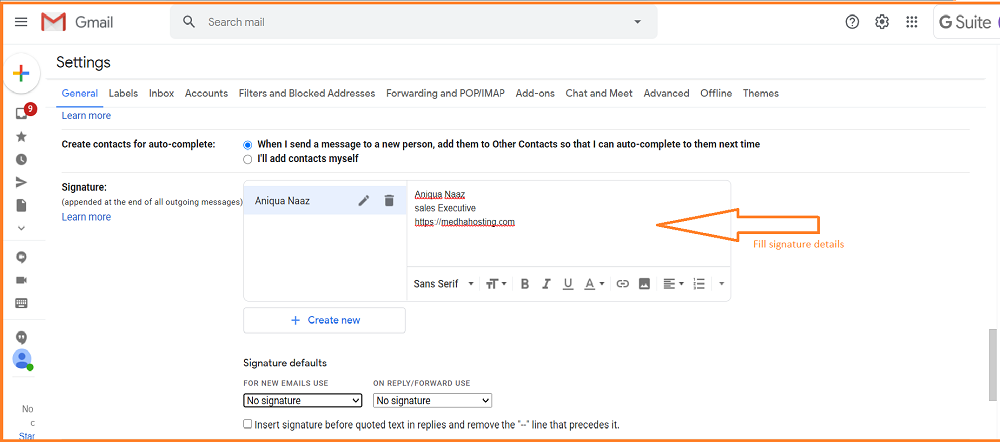
Step 4 : Setting Name
Fill the Gmail signature details and “select the name” and click on save changes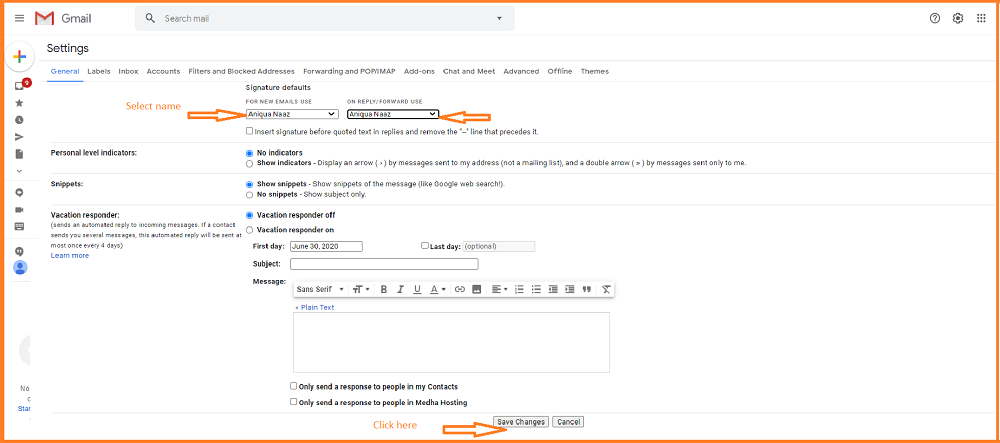
Read Here: How To Personalize Your G Suite Domain – Changing The User Images
Step 5 : Send Email with Gmail Signature
Try to create a new email to check whether your Gmail signature is working.
You can create a new mail with your Signature as shown in the below image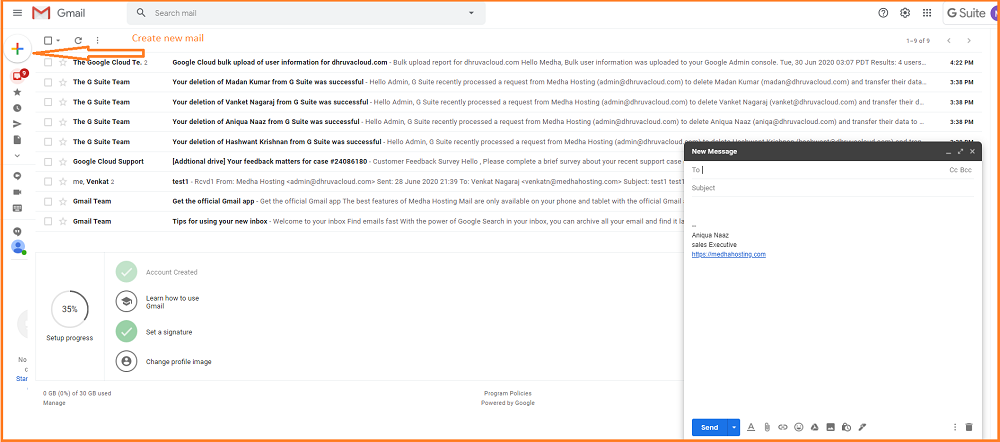
Step 5 : Conclusion
Conclusion:
Hope you understand how to add a Gmail signature in G suite. It is as simple as it is, and you can personalize your Gmail account with your professional/business details by following these steps.
However, if you got any doubts about personalizing and explore up all the features of G Suite, please feel free to reach us. Our Gsuite experts will help you.

