Step-by-step guide to create multiple user accounts in Office 365
Managing user accounts in Office 365 is an essential task for administrators. Whether you're setting up new employees or managing user roles, this guide will walk you through the process of adding a user with ease.
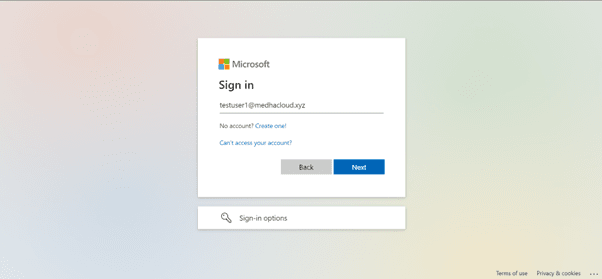
Step 1: Log in to Office 365 with Admin privileges
To start, ensure you are logged into office.com using an account with admin privileges. Without these rights, you won’t be able to create or manage users.
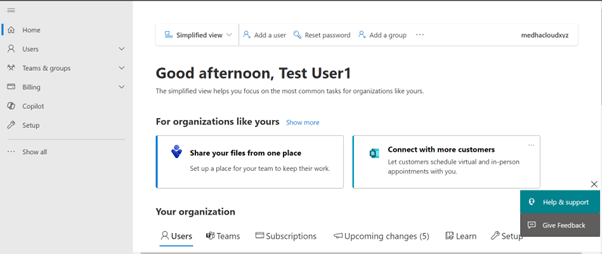
Step 2: Open the Admin panel
Once logged in, locate the Admin app from the available Office 365 applications or by selecting it from the app launcher (the grid icon in the upper left corner). This will take you to the Office 365 Admin Center.
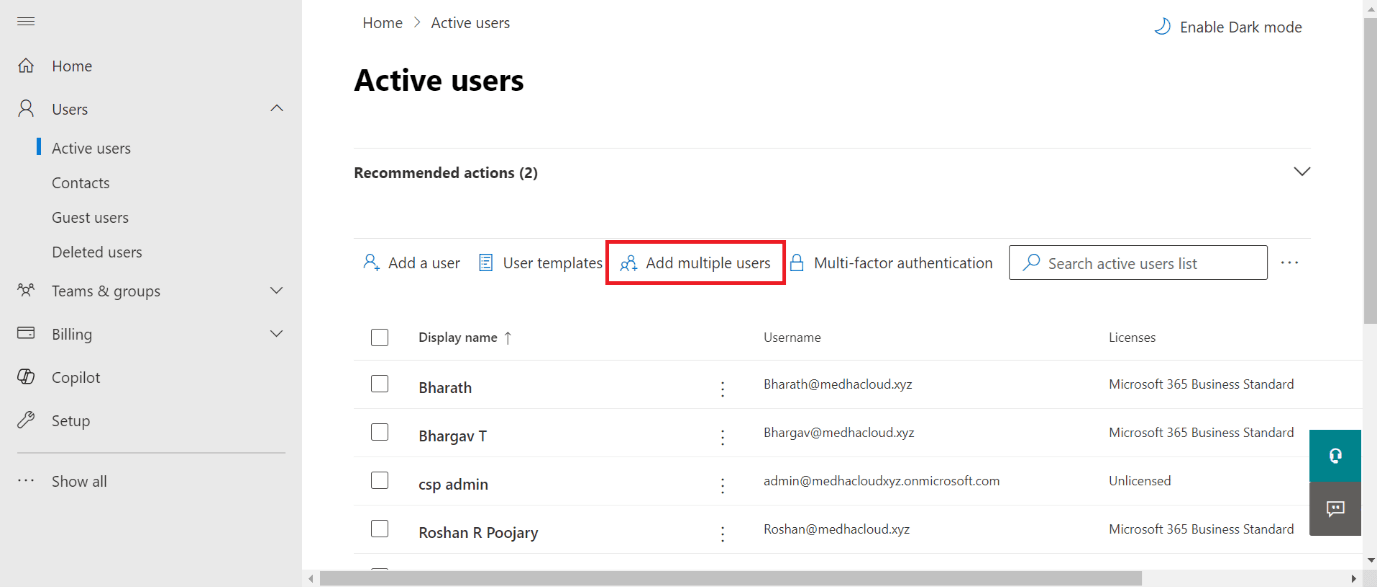
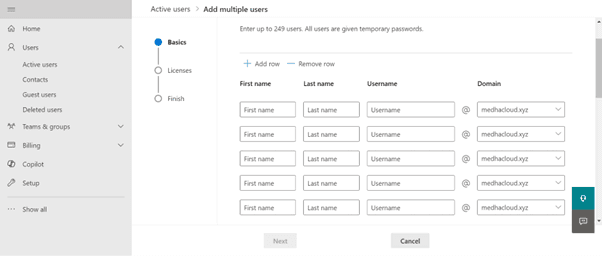
Step 3: Navigate to users > Active users > Add multiple users
In the left-hand navigation panel, go to Users, then select Active Users. Click on the Add multiple users option at the top of the screen.
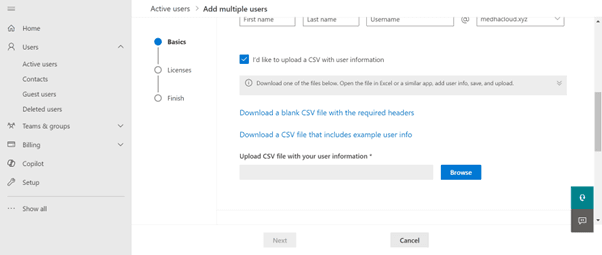
Step 4: Download the CSV template
To ensure the correct format, download the sample CSV template provided by Microsoft. It will include columns like:
- Username
- First name
- Last name
- Display name
- Job title
- Department
Fill in the required details for each user in this template.
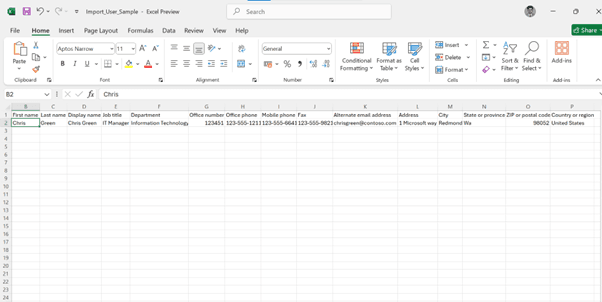
Step 5: Fill out the CSV template
Fill out the CSV file with the details of each user you want to create. Ensure that:
- Usernames are formatted correctly as email addresses (e.g., [email protected]).
- All required fields (e.g., first name, last name) are filled.
- Optional fields (like job title or department) are added if applicable.
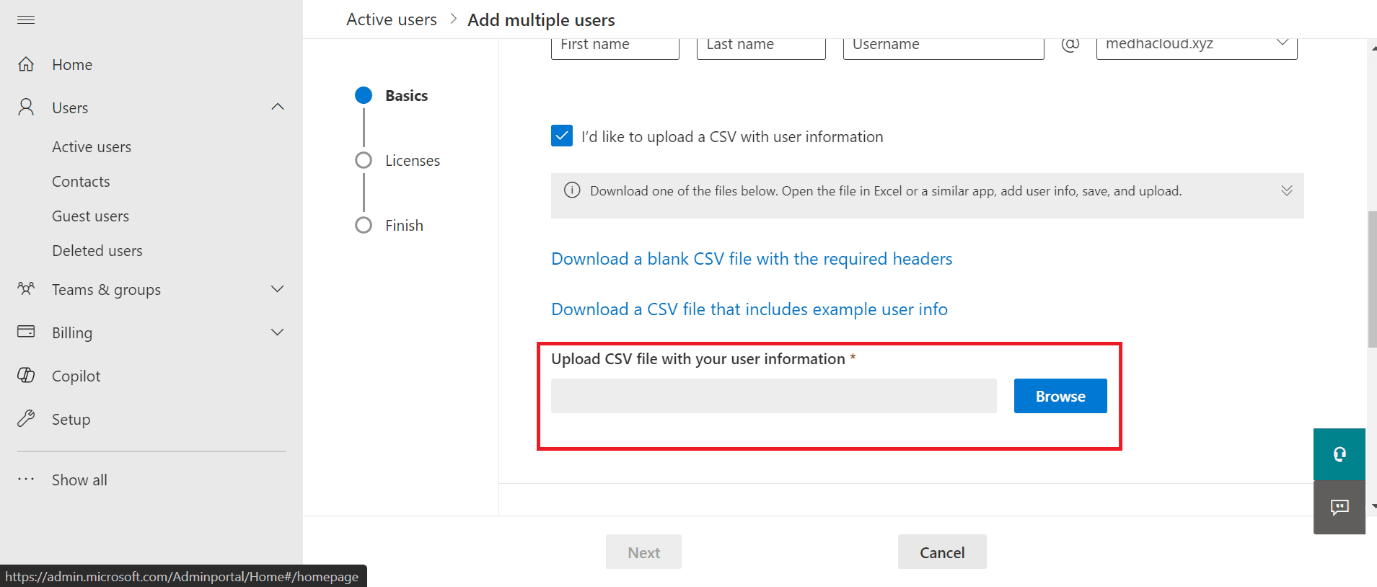
Step 6: Upload the CSV file
Once you have completed the CSV file, return to the Microsoft 365 Admin center and upload the file using the Browse option.
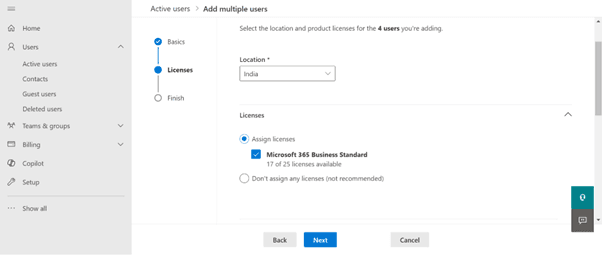
Step 7: Assign licenses
After the file is uploaded, you will be prompted to assign licenses to these users. You can assign licenses based on their roles and access needs (e.g., Microsoft Teams, SharePoint, Office apps). You can apply a single license type to all users in the CSV or assign different licenses individually.
Step 8: Set user roles (optional)
In this step, you can set user roles if needed. By default, users have no admin access, but you can assign roles like Global Admin, Billing Admin, or others based on specific requirements.
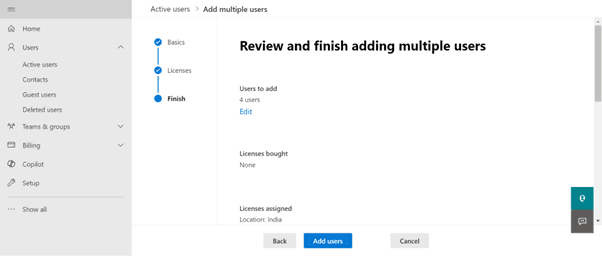
Step 9: Review and finish adding the users
Review the details to ensure everything is correct. Check that all user information is accurate and that the licenses and roles are appropriate. When satisfied, click Finish adding.
Step 10: Confirm user creation
The system will process the CSV and create the accounts. Once the process is complete, you’ll receive a confirmation message. You can also download a report showing the status of each user account creation.
By following these steps, you can efficiently create multiple user accounts in Office 365, saving time and ensuring that your organization’s setup remains consistent and organized.
For more information on Office 365 plans or additional support, feel free to Contact Medha Cloud. We’re here to help you optimize your Office 365 experience!
Compare Microsoft 365 plans and find the right license for your organization.
Microsoft 365 Plans & PricingTopics
Bharath Kumar
Senior Microsoft 365 Consultant • 8+ years
Bharath is a Senior Microsoft 365 Consultant specializing in enterprise productivity solutions and white-label IT services. He has successfully deployed Microsoft 365 for over 200 organizations and helps MSPs build scalable white-label partnerships.
More in Microsoft 365
View all
Microsoft 365 Migration Checklist — 27 Steps Before, During & After (2026)
11 min read

How Much Does Exchange to Microsoft 365 Migration Cost? (2026 Guide)
9 min read

Microsoft 365 Statistics 2026: Market Share, Adoption & Pricing Data
14 min read
Microsoft 365 Cost Optimization: How to Cut Your Licensing Spend by 30% Without Losing Features
22 min read

Microsoft 365 Security Checklist: 100 Settings Every IT Administrator Must Review
20 min read

Microsoft 365 Security Hardening Guide: 50 Critical Settings Every Business Should Enable
25 min read