Step-by-step guide to blocking and unblocking user sign-in in Office 365
As an administrator in Office 365, you may need to manage user access by blocking or unblocking sign-in for specific users. This feature is essential for ensuring security, especially when a user leaves the organization or when their access needs to be temporarily restricted. This guide will walk you through the process of blocking and unblocking user sign-in in Office 365.
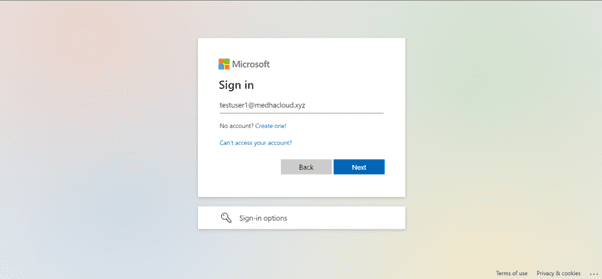
Step 1: Log in to Office 365 with Admin privileges
Begin by logging into office.com using an admin account. Only users with administrative privileges can manage sign-in settings for other users.
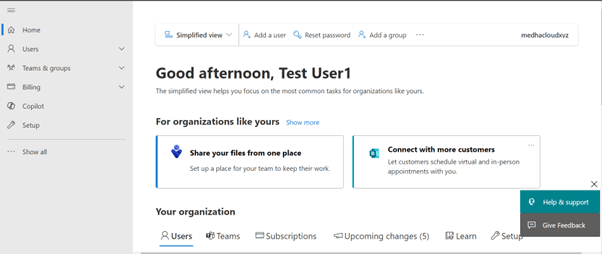
Step 2: Open the Admin panel
Once logged in, access the Admin app from the Office 365 app launcher (the grid icon in the upper left corner). This will take you to the Office 365 Admin Center, where you can manage user accounts.
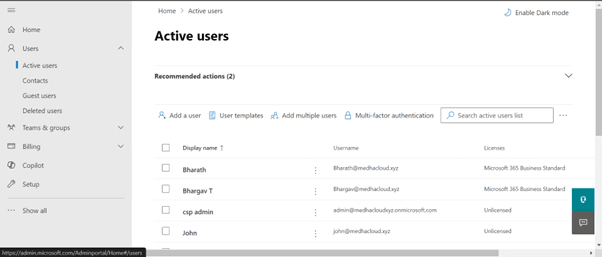
Step 3: Navigate to users > Active users
In the left-hand navigation pane, click on Users, then select Active Users. This section displays a list of all active users in your organization.
Step 4: Select the user to manage sign-in
From the list of active users, click on the name of the user whose sign-in status you want to modify. This will open their account details.
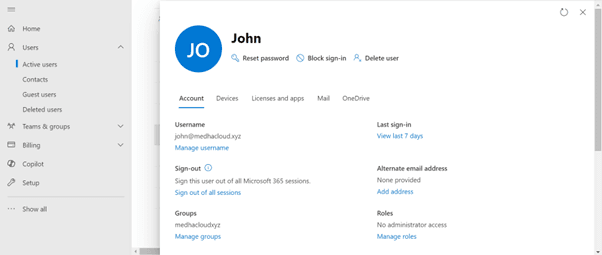
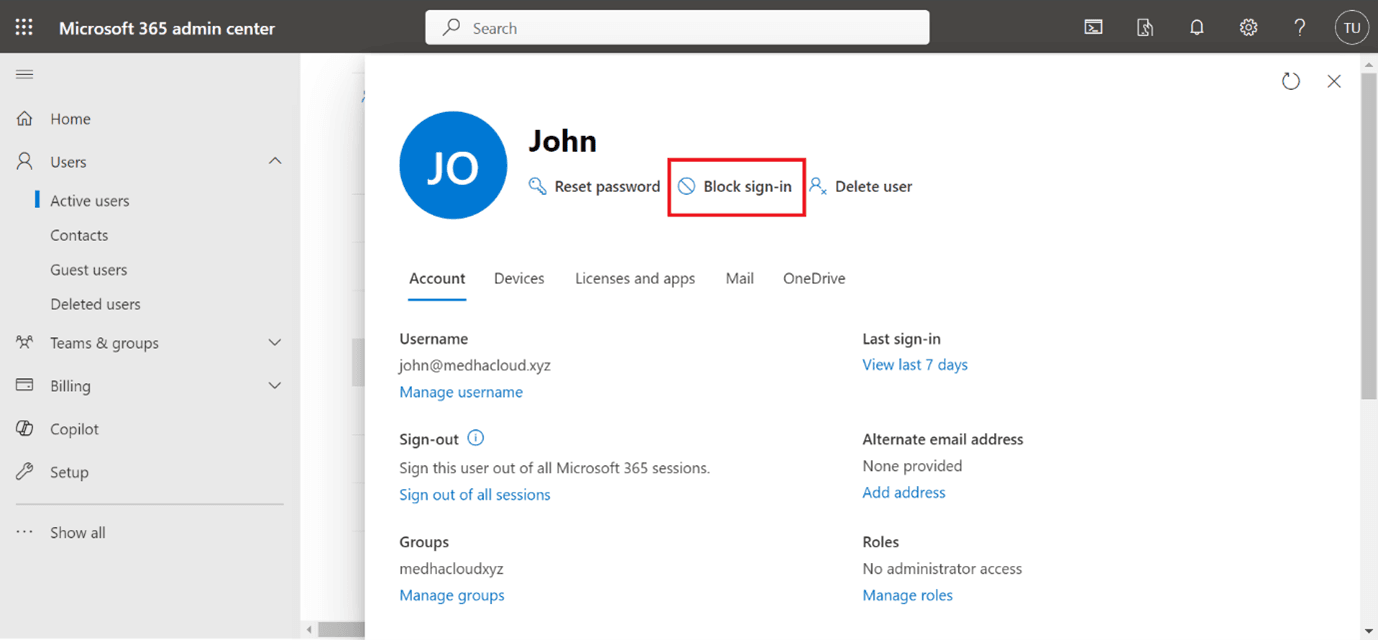
Step 5: Block sign-in
To block sign-in for the user, look for the Block sign-in option. Click on it to restrict the user's access to their account. This action prevents the user from signing in to Office 365 services.
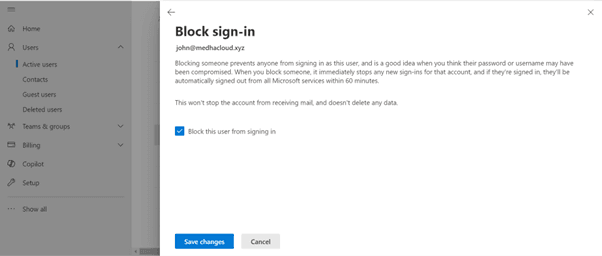
Step 6: Save changes
After blocking the sign-in, click the Save button to apply the change. The user will now be unable to access their Office 365 account.
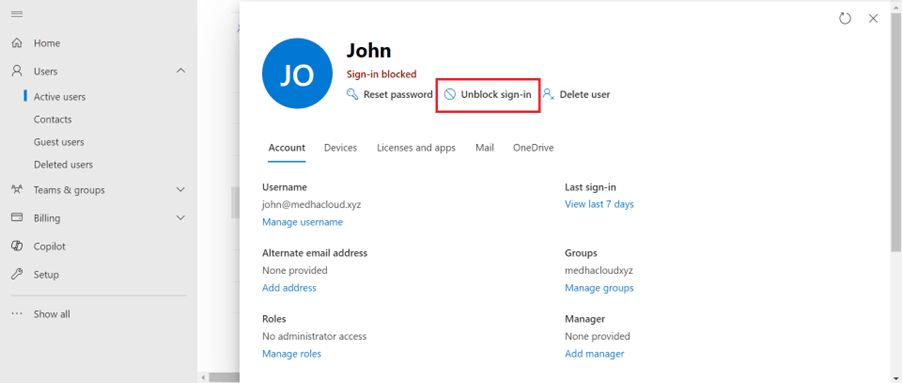
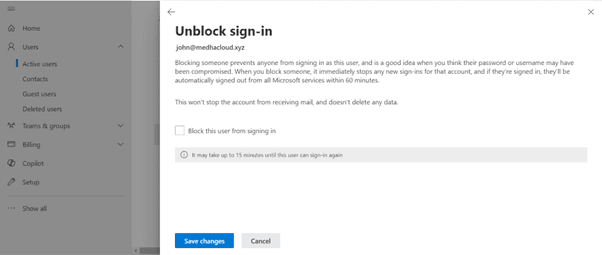
Step 7: Unblock sign-in
If you need to allow the user to sign in again, follow the same steps to access their account details. In the Account section, you will find the option to Unblock sign-in. Click on it to restore the user’s access.
Step 8: Save changes again
After unblocking the sign-in, make sure to click the Save button once more to apply the changes. The user will regain access to their Office 365 account.
Step 9: Verify Sign-in status (optional)
To confirm that the sign-in status has been updated successfully, return to the Active Users section and select the user again. Review their account details to ensure the changes are reflected.
Congratulations! You’ve successfully blocked and unblocked user sign-in in Office 365, allowing you to manage user access effectively and maintain security within your organization.
Compare Microsoft 365 plans and find the right license for your organization.
Microsoft 365 Licensing OptionsTopics
Bharath Kumar
Senior Microsoft 365 Consultant • 8+ years
Bharath is a Senior Microsoft 365 Consultant specializing in enterprise productivity solutions and white-label IT services. He has successfully deployed Microsoft 365 for over 200 organizations and helps MSPs build scalable white-label partnerships.
More in Microsoft 365
View all
Microsoft Copilot Free — What You Get, Limits & Every Way to Use It (2026)
7 min read

What Is Microsoft Copilot? Free vs Pro vs Microsoft 365 Copilot Explained (2026)
9 min read

Microsoft Word Online Free — How to Use Real Word Without Paying (2026)
6 min read

PowerPoint Download — Free Web Version, Mobile & Desktop (2026)
6 min read

Word Download — Free Web Word, Mobile Apps & Desktop Install (2026)
6 min read

Outlook Download — New Outlook, Classic, Mac, Mobile & Free Web (2026)
7 min read